Walkerville Seedlings 2025
Project Overview
Last year, I started several trays of seedlings for use in my garden, with poor results. This year, I have revamped my entire setup, and have been growing seendlings with the intention of distributing among my extended family. The improvement to the setup, however, has yeilded far better results than I had anticipated, and I am now offering seed starters to my local community in Walkerville for a nominal cost to help recoup the costs of the materials.
This page will provide you with information on how to receive seedlings if you are interested, as well as information regarding my setup in case you wish to replicate it next year!
I appreciate everyones supprt, and look forward to growing the project next year!
Year Overview
Most of the plants available when I first launched this site were the first batch for the upcoming year. They are a pretty mixed bag, some of them I definitely started too early.
I plan to do succession plantings for many of the staple items, such as Spinach, Lettuce, and Kale, as well as some annual flowers. Marigolds in particular, I enjoyed growing enough, that I have ordered a few thousands seedlings to plant.
If there is anything in particular which you might be interested in, or which you would like to request for next year, please let me know!
How It Works
Below you'll find a catalog of available seedlings. I can't guarantee that all of the seedlings will be available, and seedlings will be on a first-come, first-served basis. Let me know what you are interested in and I'll see what I can do.
To request seedlings or learn more about availability, please reach out to me via facebook messenger. Updates to quantities will be made regularly as seedlings are claimed or as new batches become available. I'm not able to make change, so please bring exact change when picking up at your coordinated pickup time.
Gently used trays and cells will gladly be accepted after planting for reuse next year. Helps to both save money & reduce unecessary plastic waste.
Everything is 6 seedlings for $3. Some of the flowers are available in 3x3 cells, which are $4 for 9.
Available Plants


Peppers

Herbs

Leafy Greens


Generic Veg


About the setup
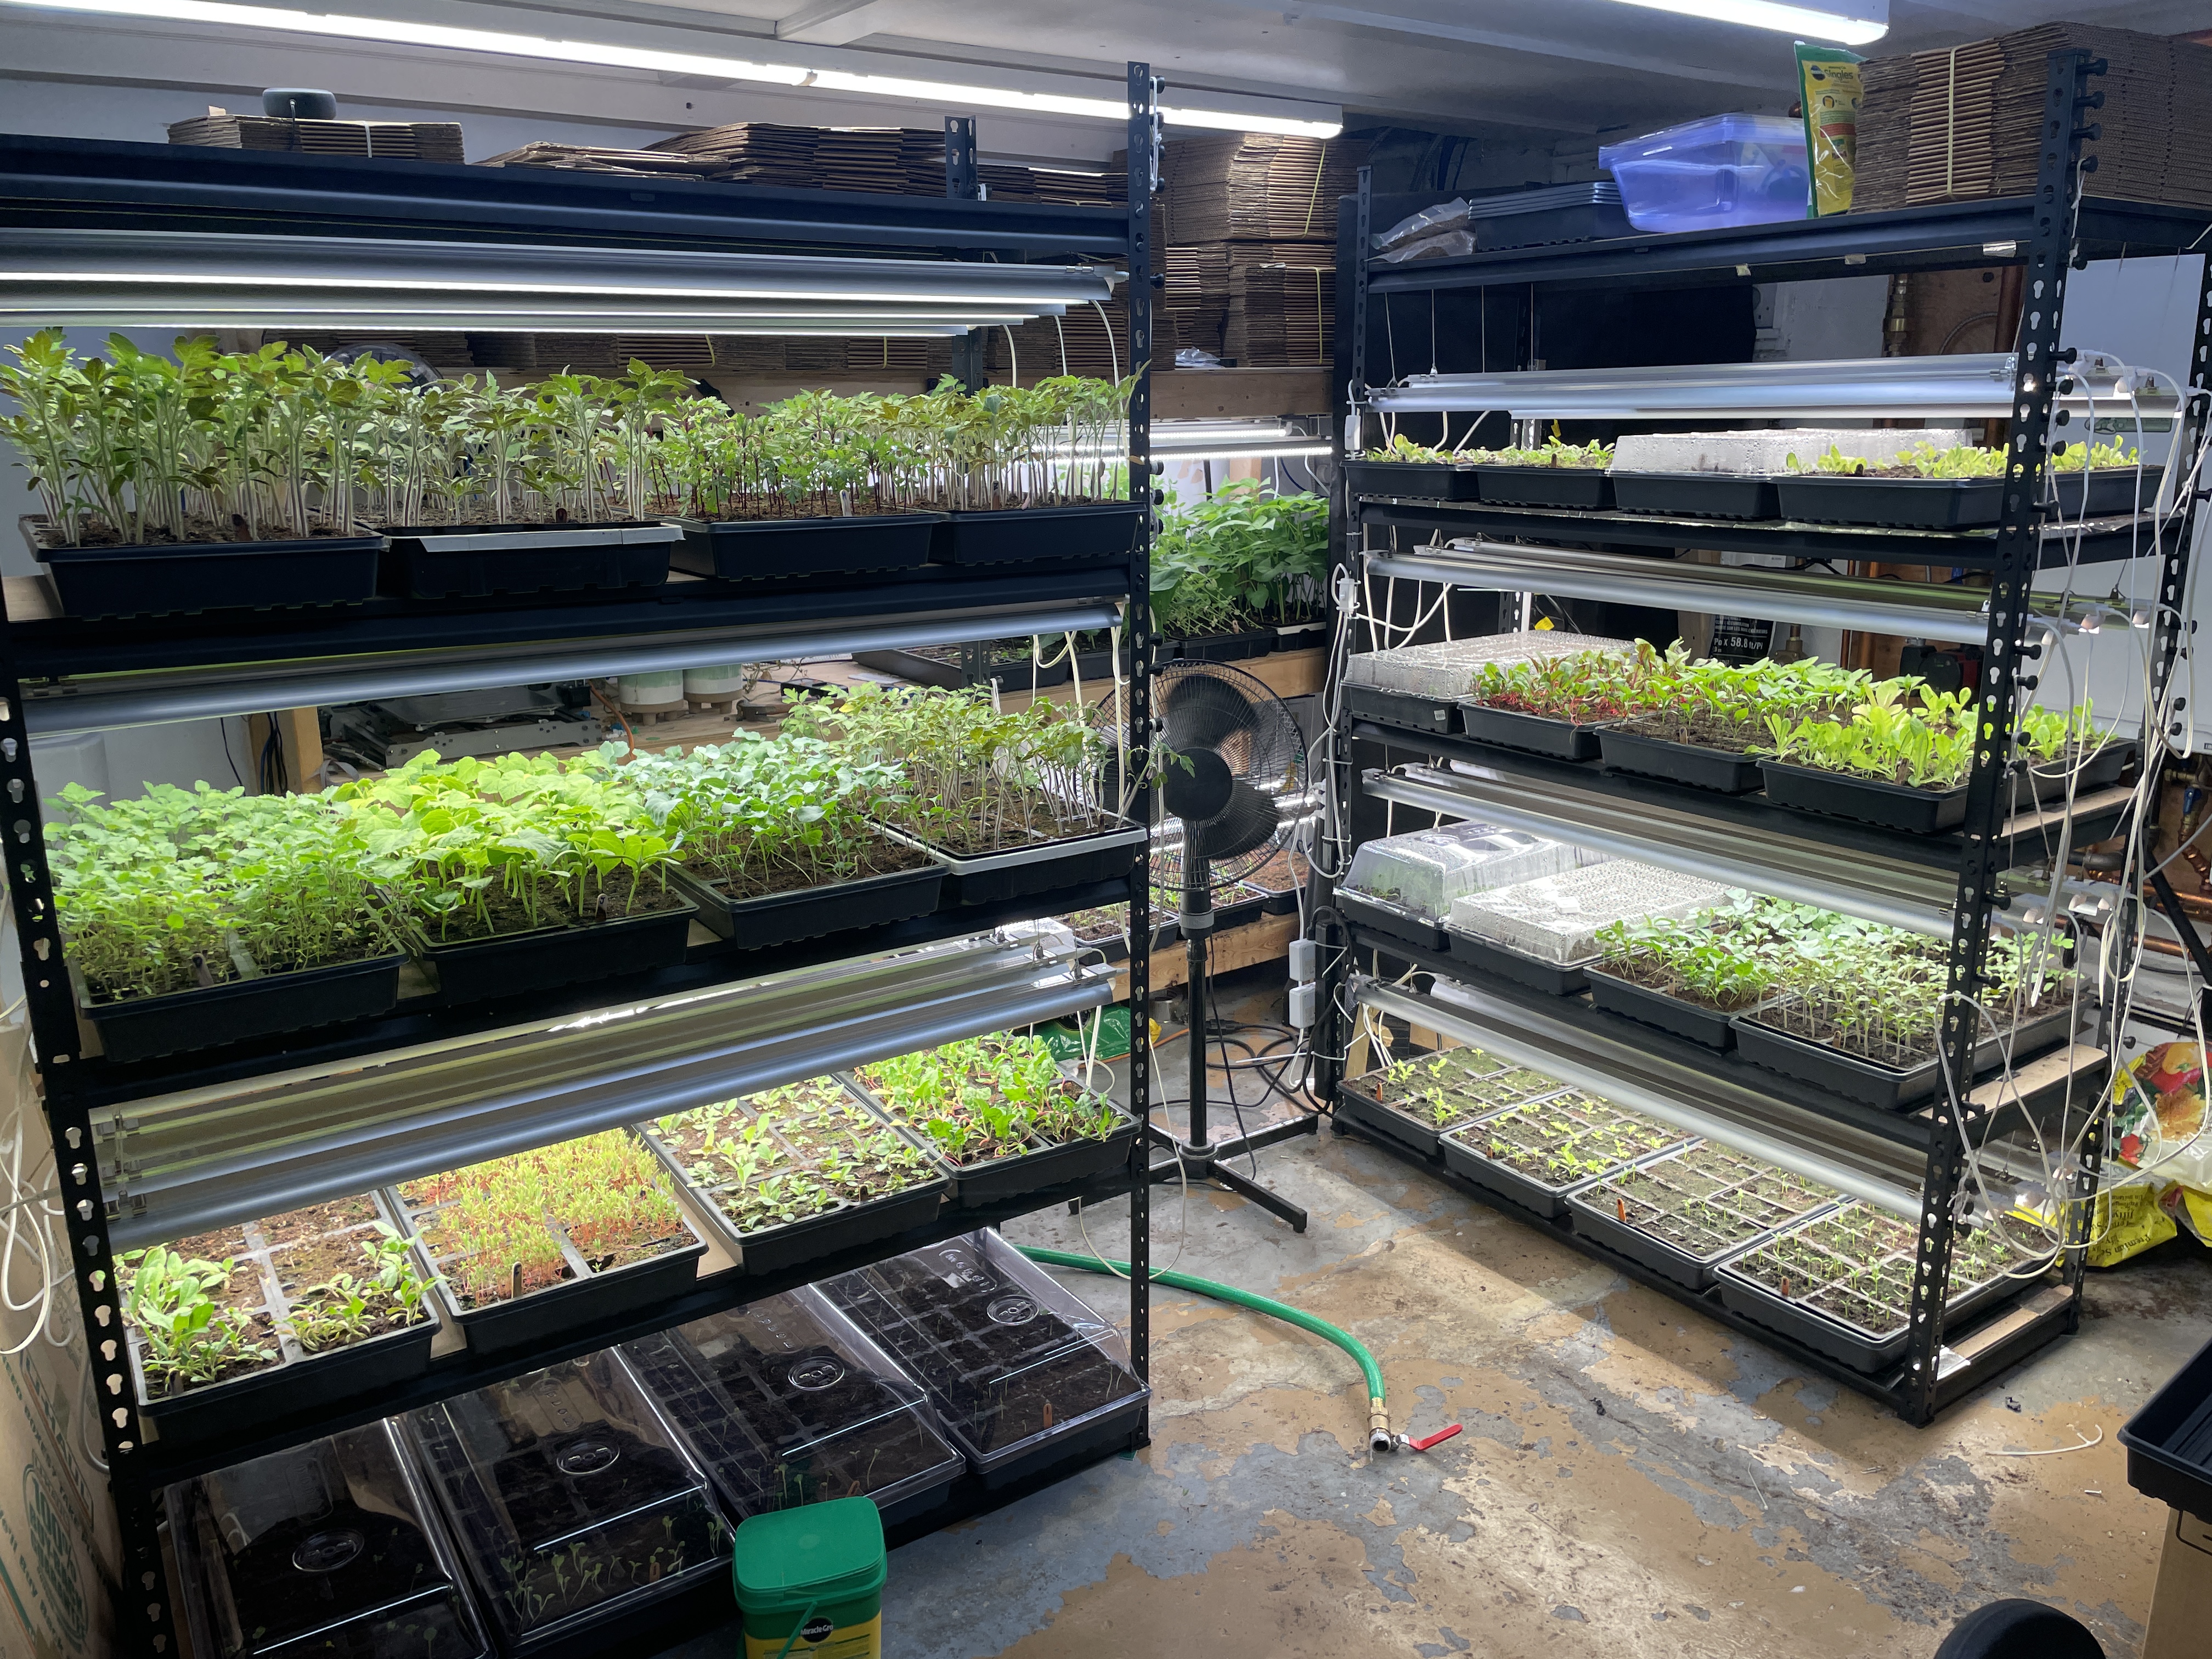
This is the first year I have ran with this particular setup, but it has been acceptably successful thus far. They consist of a few elements, but let me lay some groundwork regarding my verbage:
I regard an individual 'cell' as a shelf which, in the current configuration, consists of 4 shelves, each shelf supporting 4 trays of seedlings. The rest of what I have outlined here are some definitions which apply to this page of the website/project. Some of the definitions might vary based on your understanding of the words in a different context, which is why I have outlined them here.
Definitions:
Cell: A single shelving unit comprised of multiple levels, each supporting seedlings and the components necessary to grow them.
Shelf: A single level of trays and the necessary support equipment.
Tray: A plastic container for holding soil, seedlings, Cell Paks, and water.
1020 Tray: A specific type of tray which is a standard 10" x 20", and can vary in depth. These are the most popular type of tray for starting seedlings.
Cell Pak: A container for growing seedlings in, typically the plastic pods that you might be familiar with when planting seedlings from nurseries.
Dome: A plastic lid which sits ontop of a tray and allows the passage of light (and in some cases, air) used to increase humidity for the seedlings.
Light: A device which emits light for the purpose of growing seedlings, can be specifically designed for seedlings, or a generic shop LED, Incandescent etc.
Power Timer: A mechanical or digital device used to turn power on and off at specific times automatically.
Soil: A medium for growing seedlings, typically a mix of peat moss, vermiculite, and perlite. After planting, soil typically contains organics, clay, and other matierals, as well as the nutrients necessary for supporting plants.
Seedling: A young plant in the process of growing, typically from a seed. This is the term I will use to refer to the young plants that I grow in the trays.
Transplanting: The process of planting a seedling into the soil, typically from a cell or cell pak, and into a pot or garden bed.
Plant: Umm, it's like, the things that we eat and which grow from water and sunlight. They come from these little small things called seeds, which is how plants reproduce.
Water: I'm just gonna go ahead and assume that if you don't know what water is, you're a special kind of robot that somehow hasn't discerned what water was from all of human literature, or you don't natively speak english. If that's the case, then it's the wet stuff that makes up the majority of the Earth, and which we need in order to live.
The Setup
Shelving Units
The shelving units I purchased are from Amazon, have 5 shelves, were 48" wide, 18" deep, and 72" tall. At the time, I purchased them for 140.11 CAD a piece. They claimed a 2000lb capacity, and have worked fairly well. There was one caveat however;
The partical board sheets, aside from my concerns that they will expand once wet as is the nature of glued together saw dust, were actually a bit too thin. They support the weight of the trays fine, but the metal of the shelf extends up a few millimeters above the surface. If not rectified, the trays would sit on two thin edges at either end, increasing the risk of damage. Additionally, I did not like the idea of creating pressure points on the heating pads for the shelves I am using them on, plus they do not make contact with the majority of the tray wasting their potential to heat.
To fix the issue of the lip, I cut up some of the carboard boxes the heating pads came in, and taped them to the edges. This raised the shelf up enough that it cleared the lip, thus preventing these potential issues.
Heating Pads
I purchased heating pads this year. These particular units were 10w rated, and cost about $18 a piece. Each mat supports one tray and is claimed to raise the temperature by around 10 degrees celsius from abient.
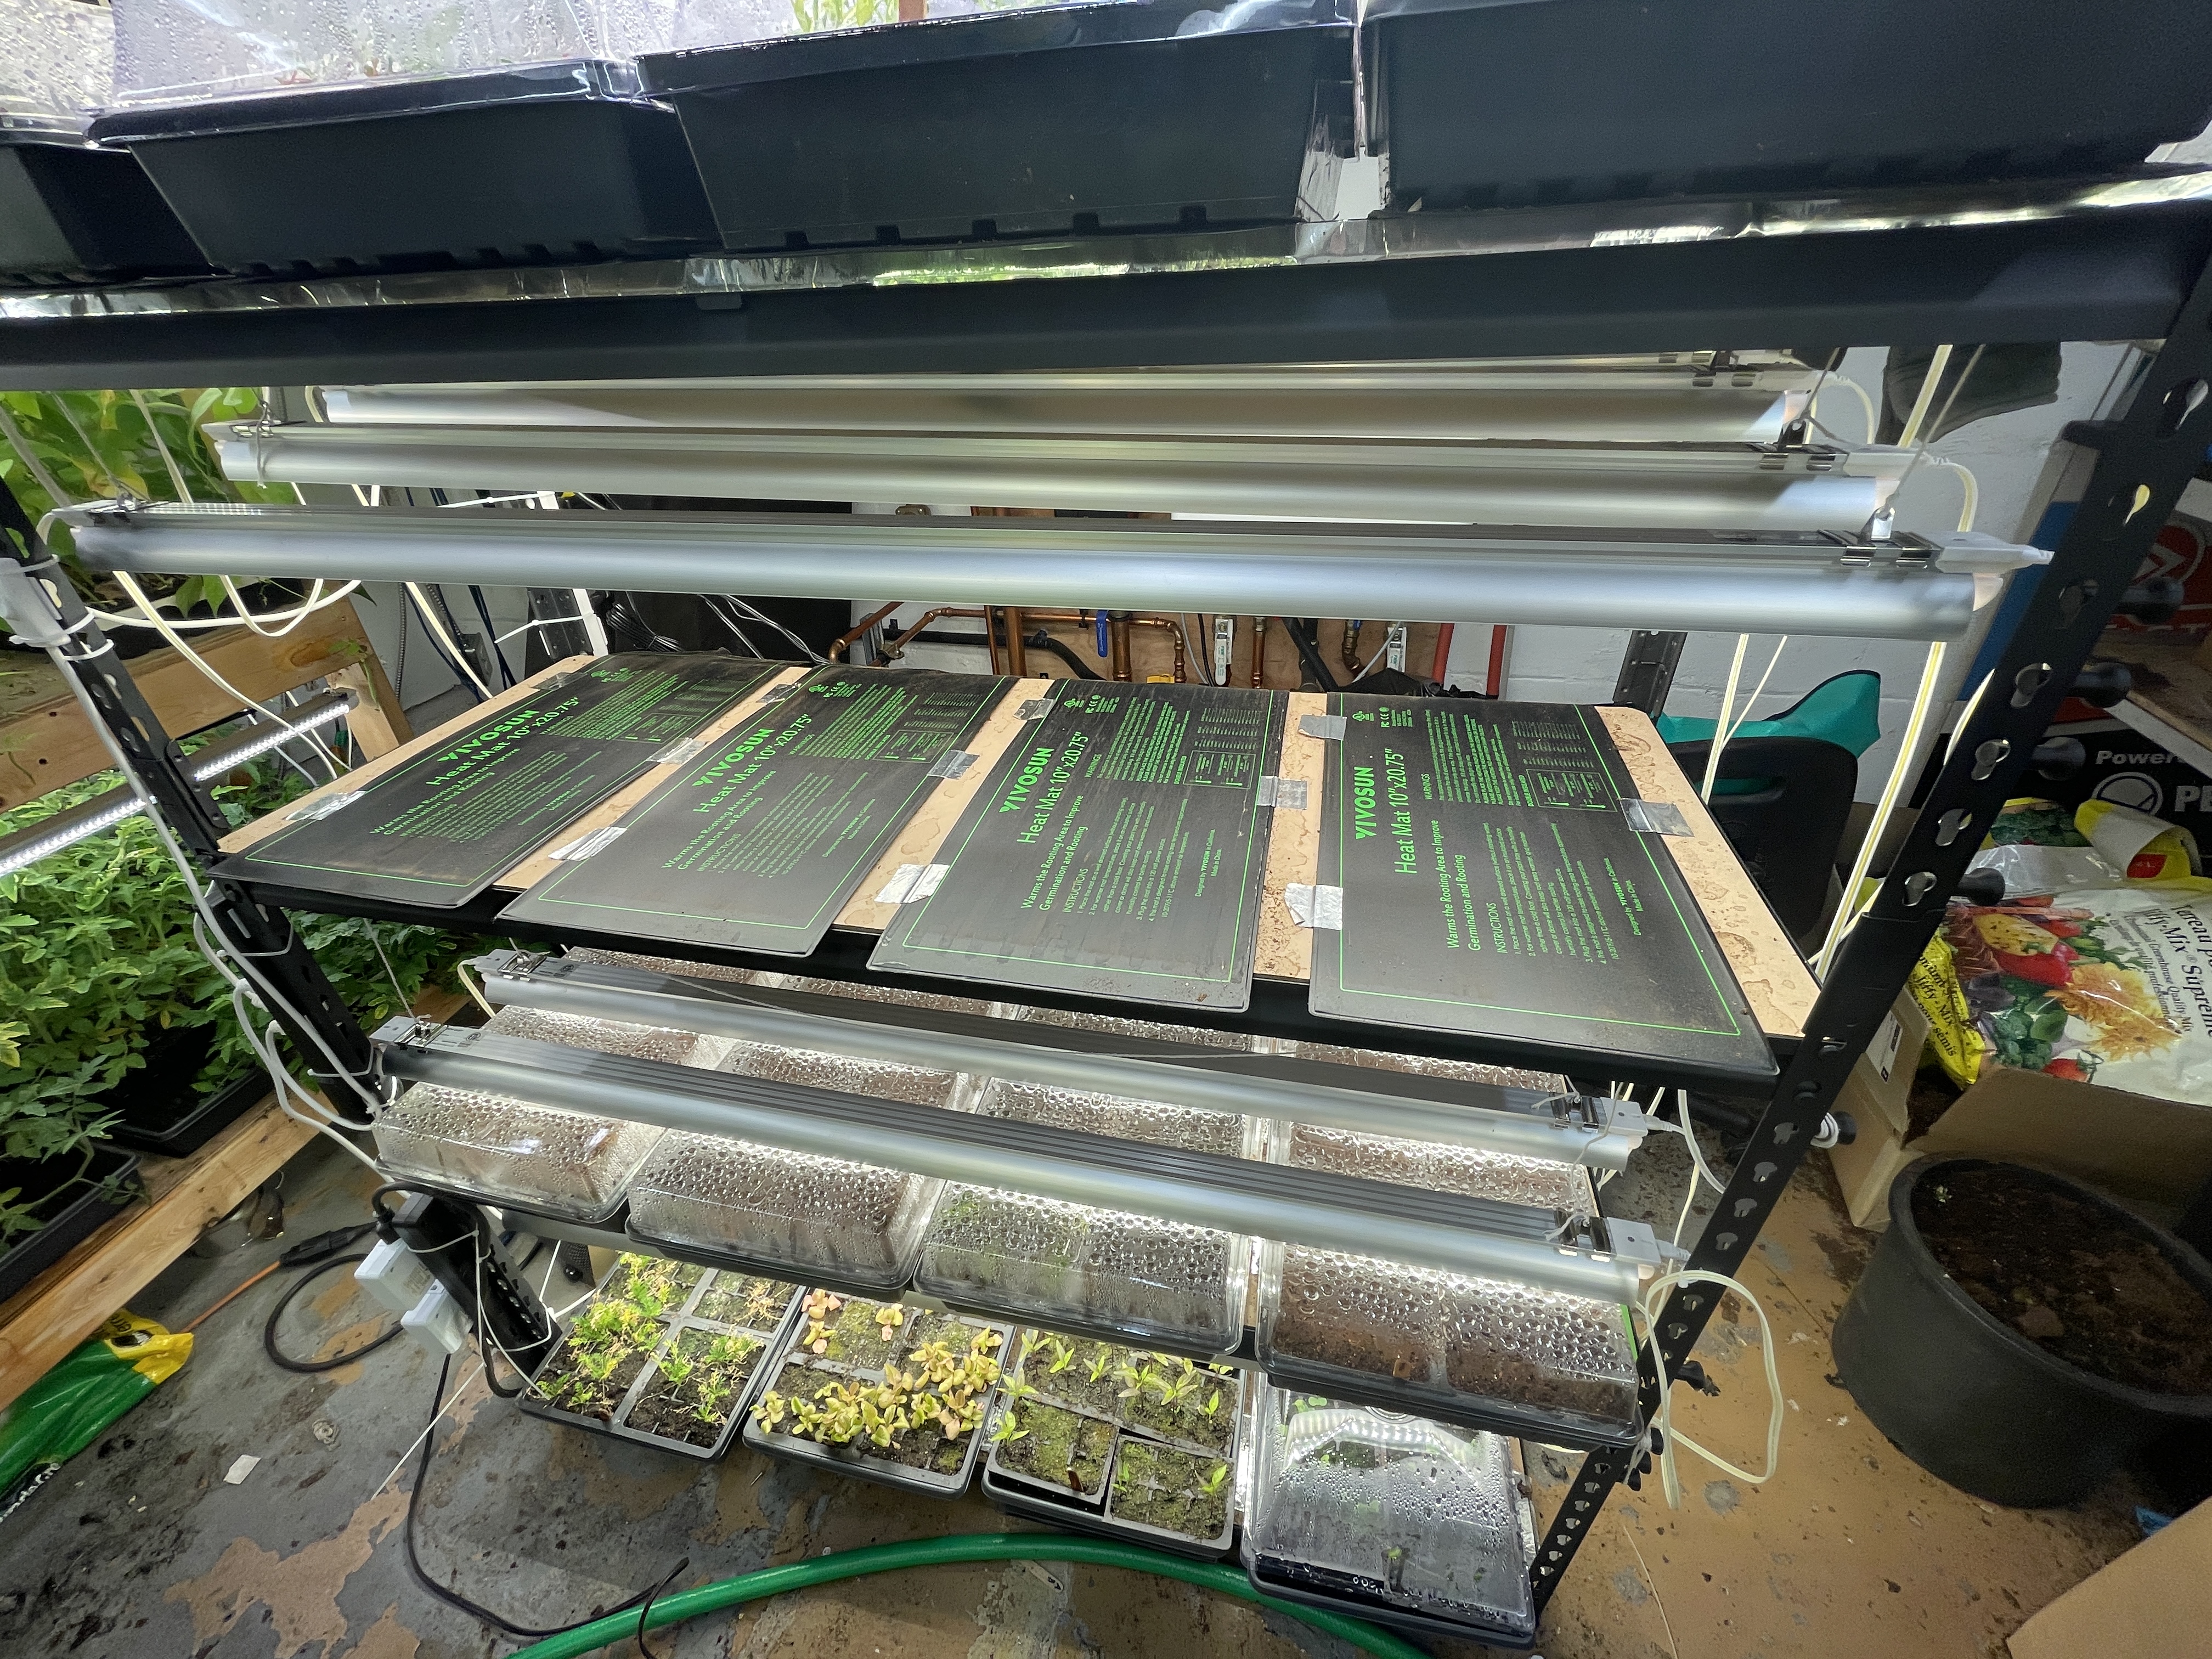
To secure the heating pads, I used aluminum foil tape, or duct tape (not 'duck' tape). In the phot I used only small pieces, although I later switched to taping the entire side of the pads as these initial units sometimes clung to the trays. A more expensive, but likely better tape to use, would be gaffers tape. I did not have any available at the time.
I will discuss more about the cabling/wire management in a later section.
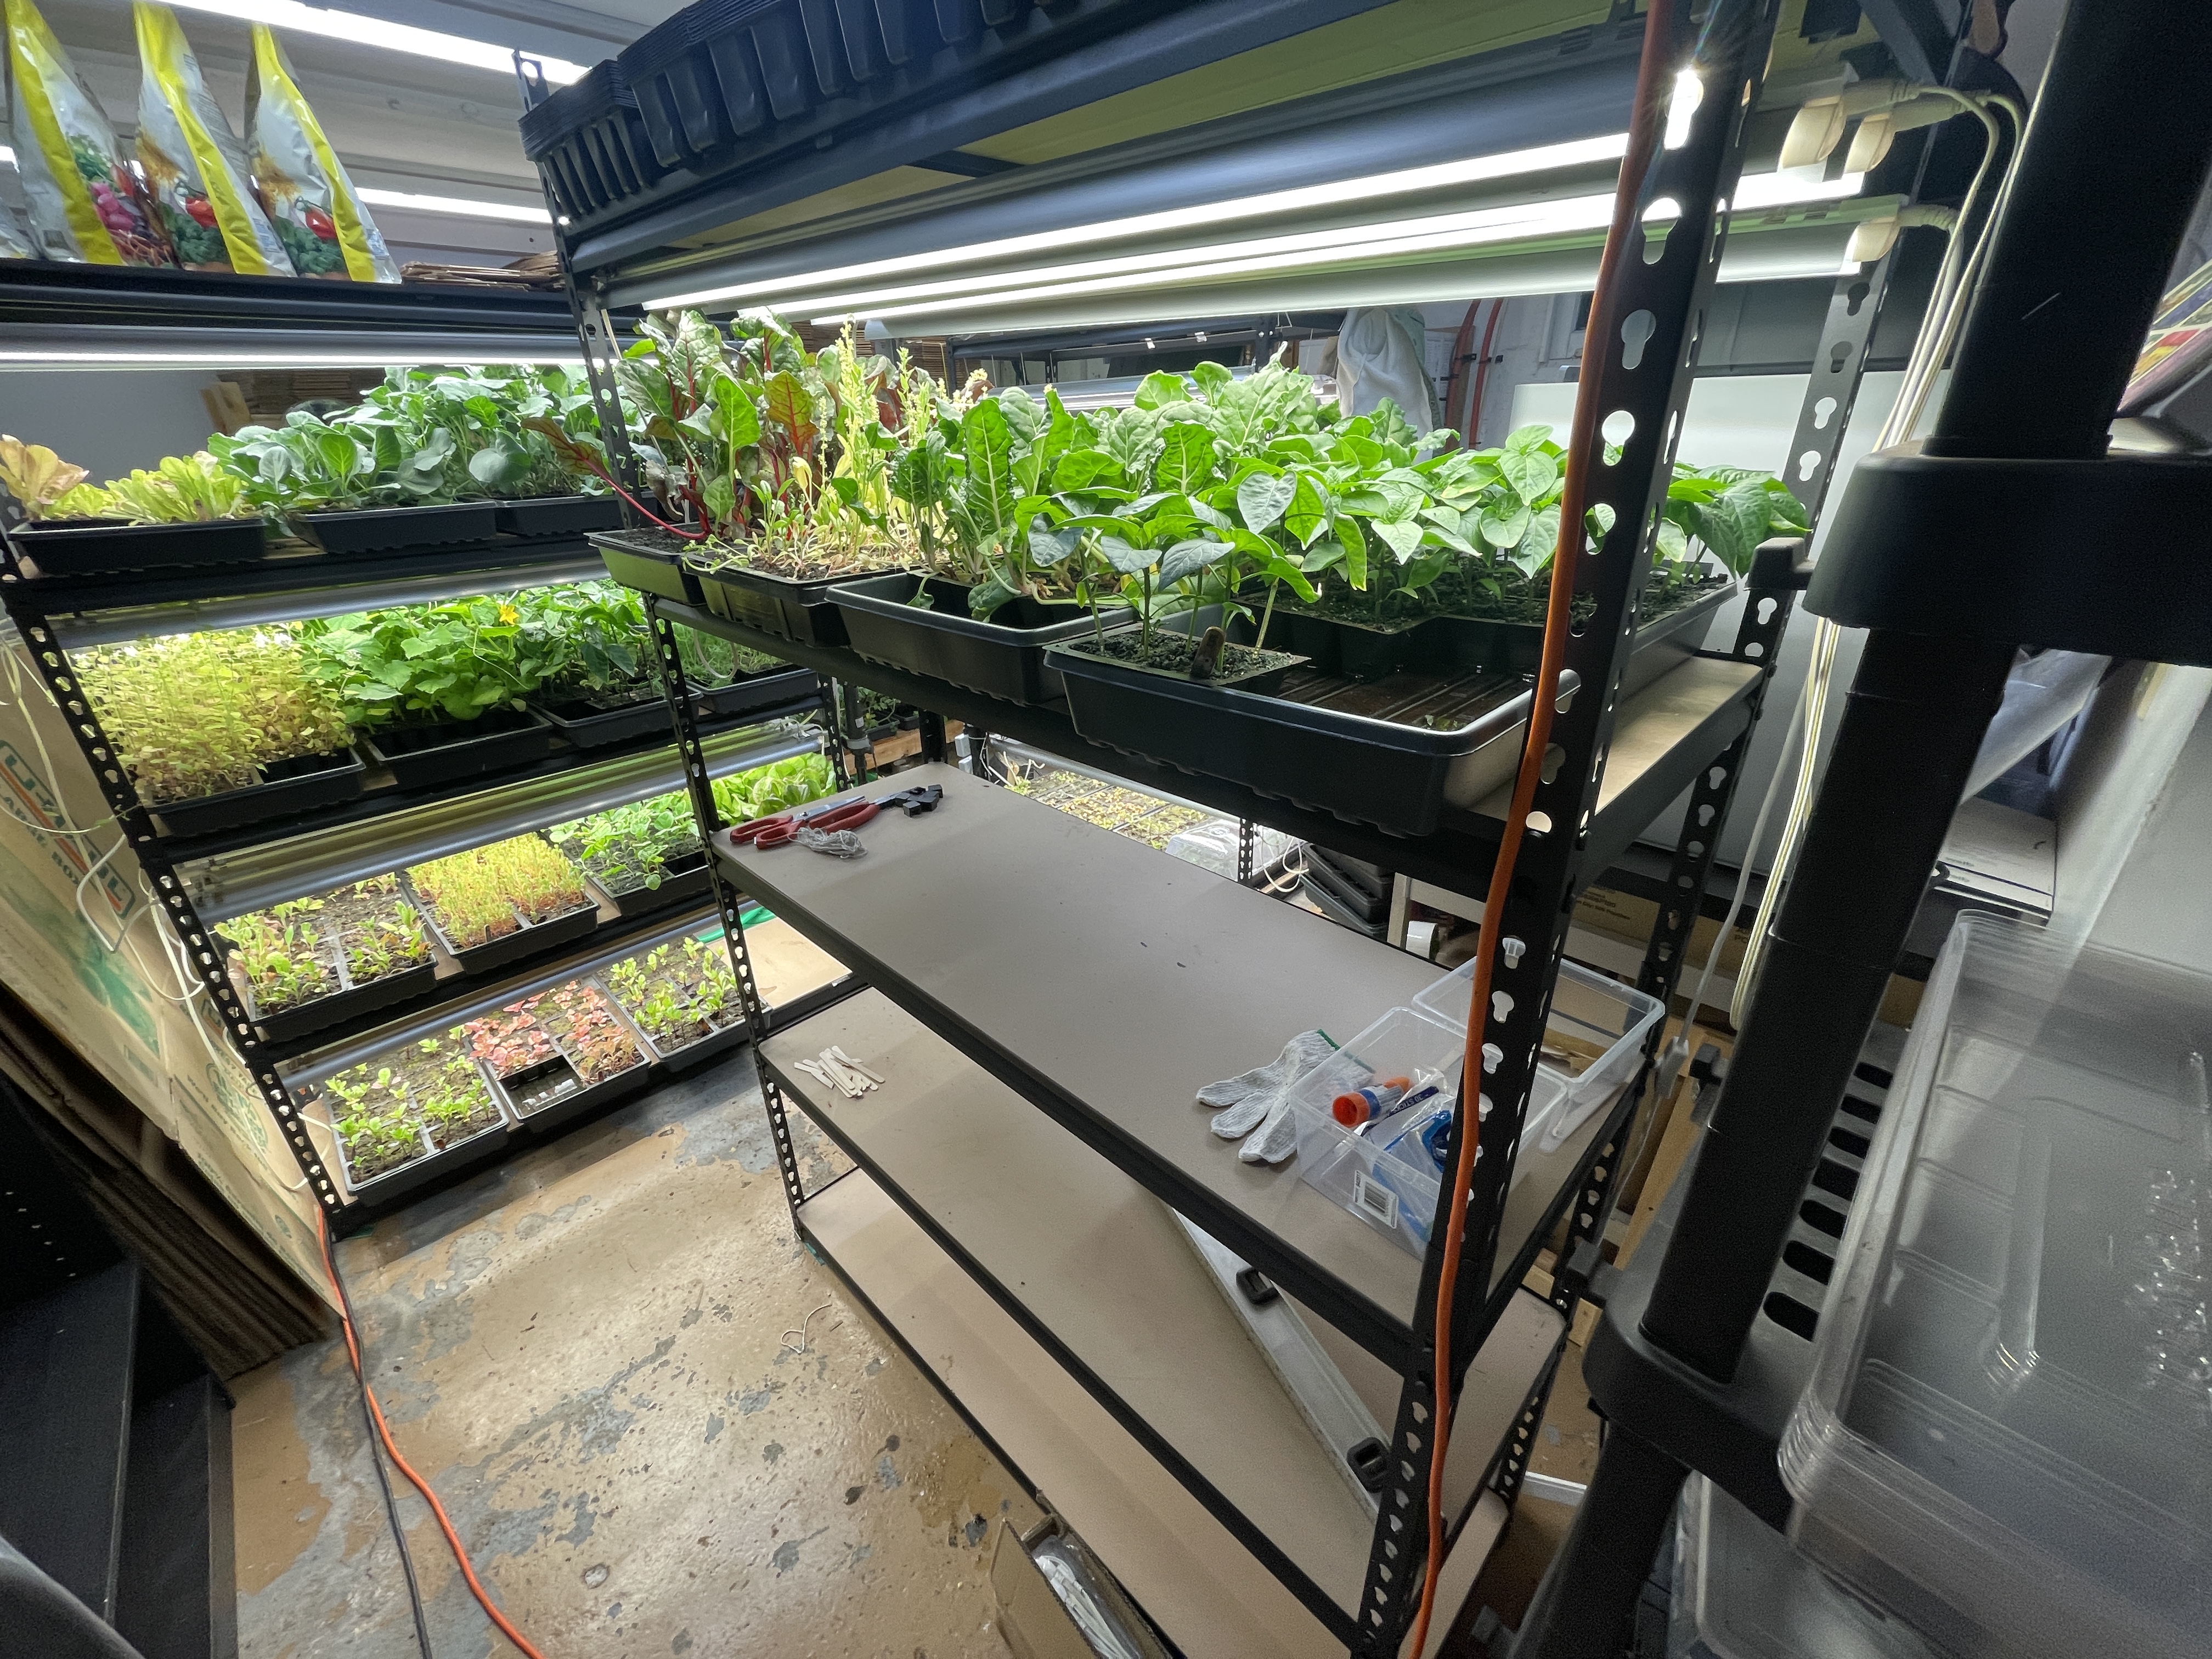
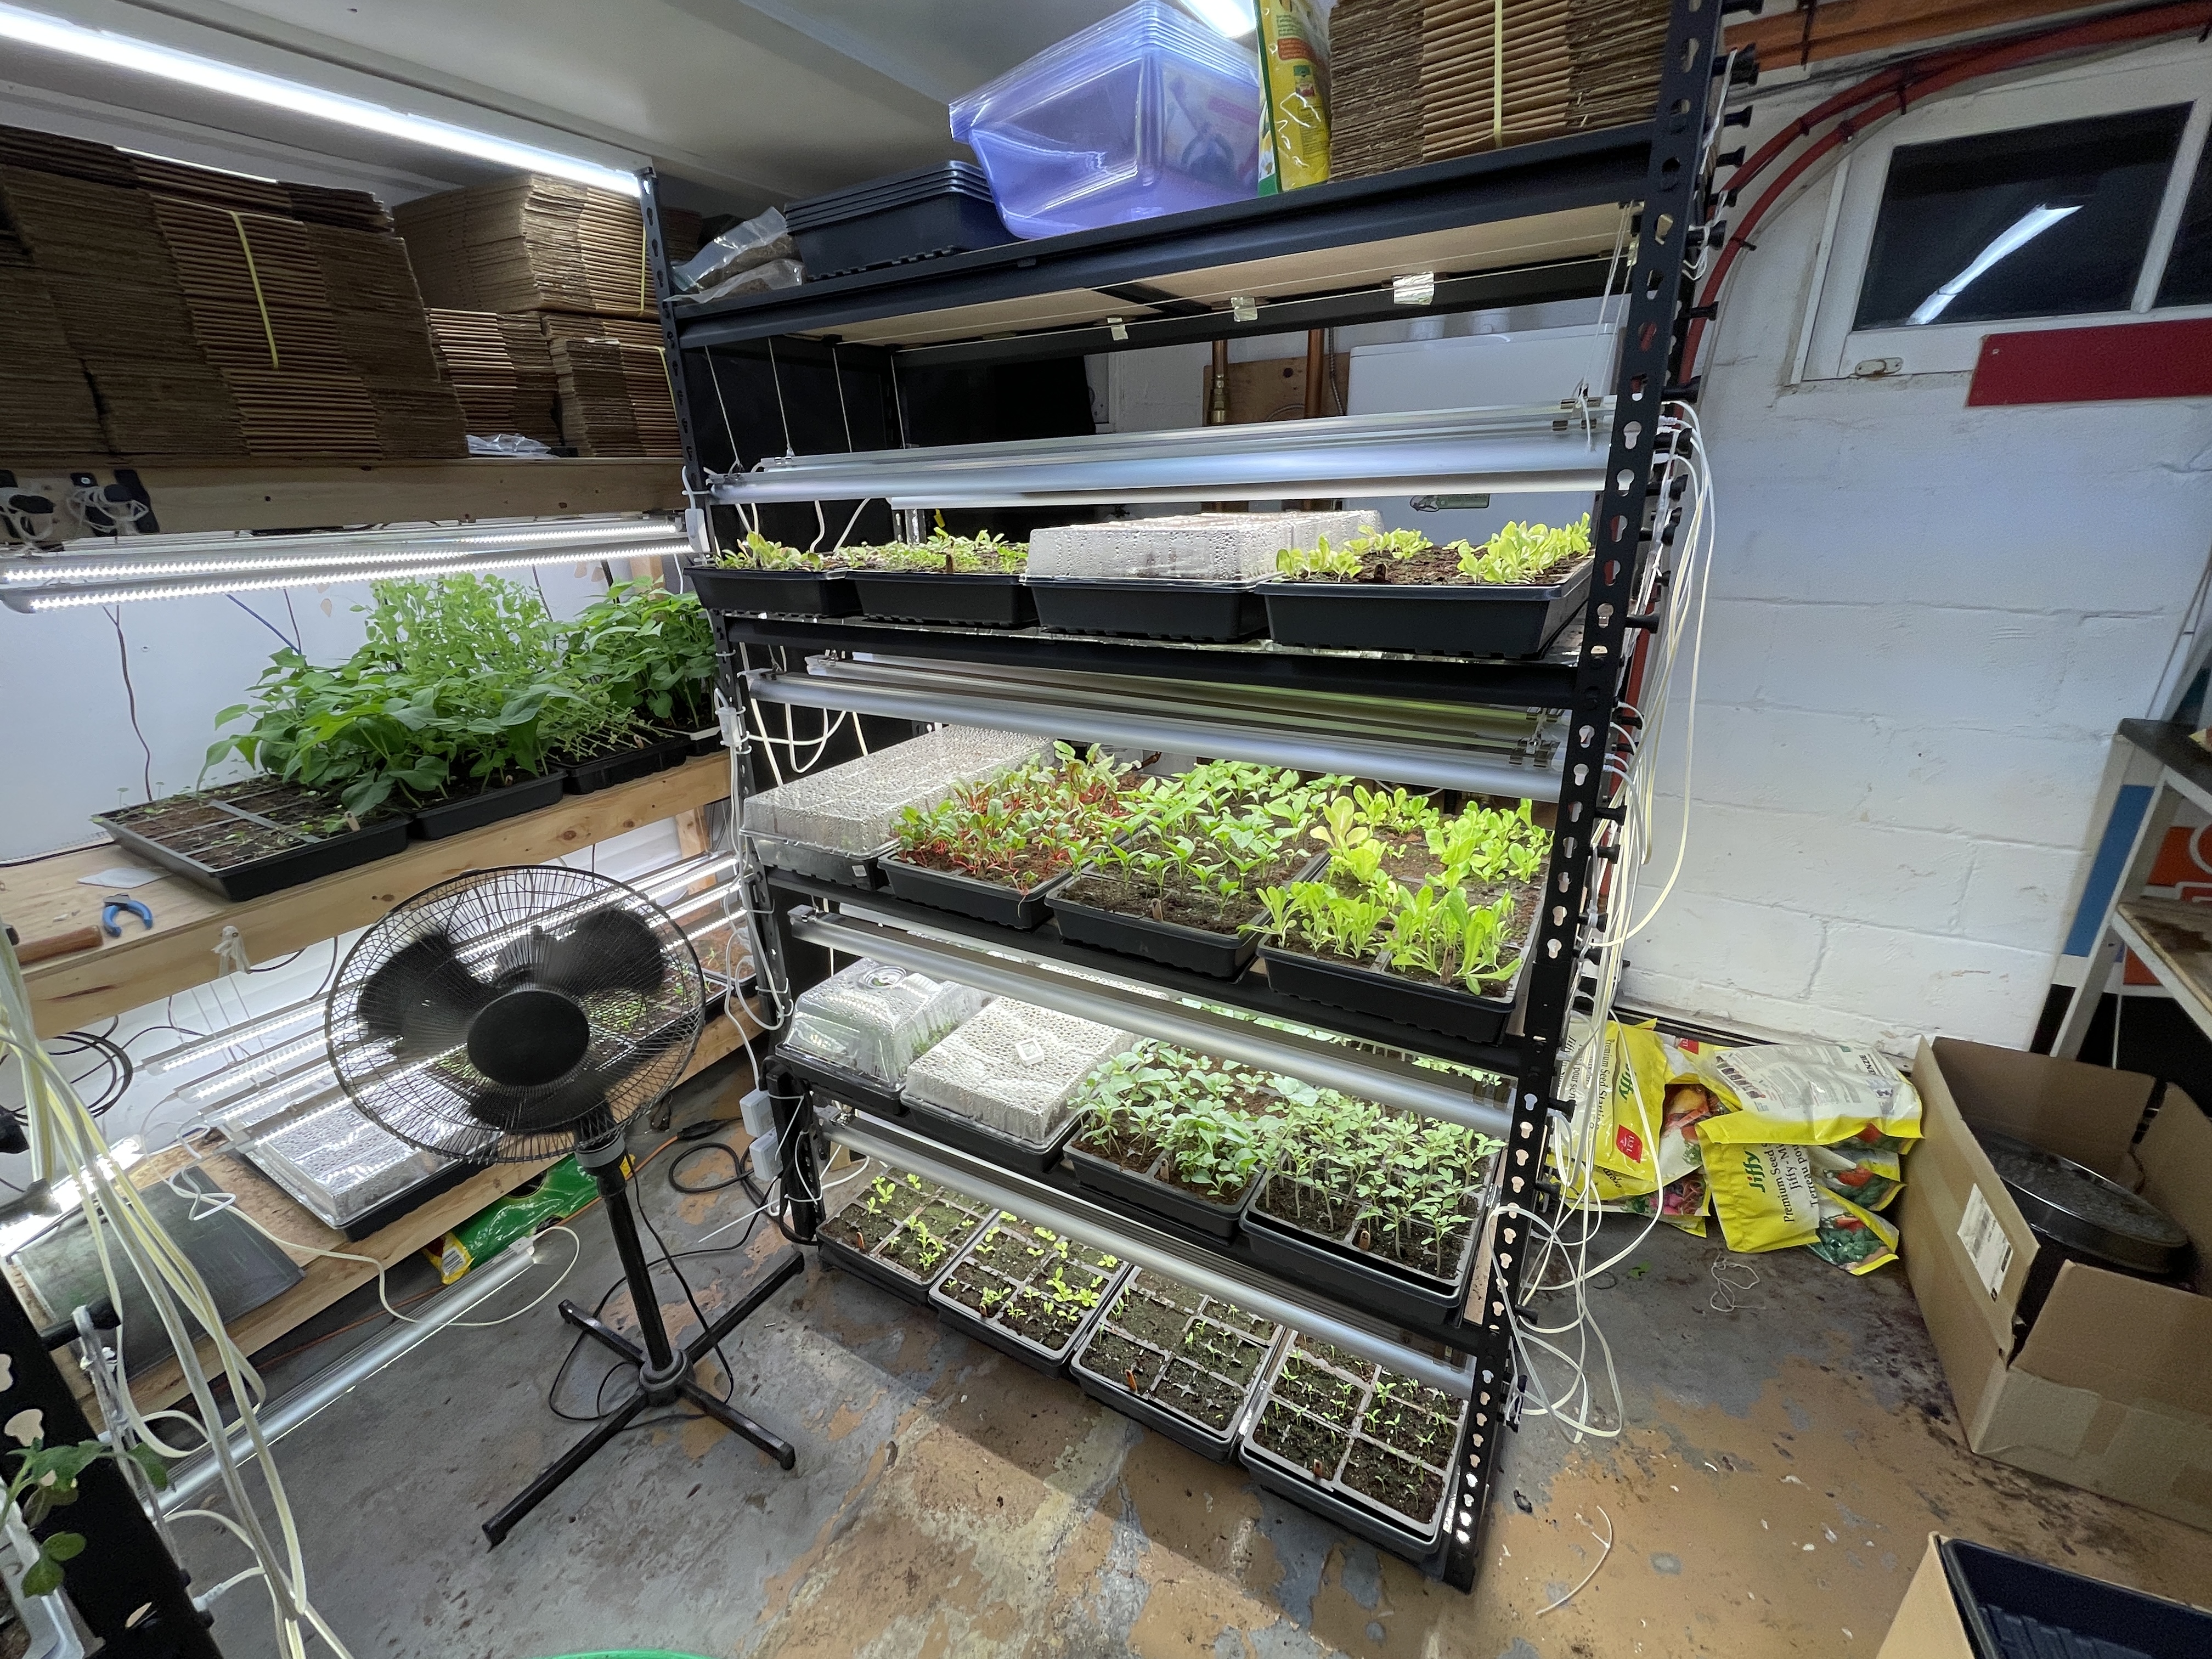
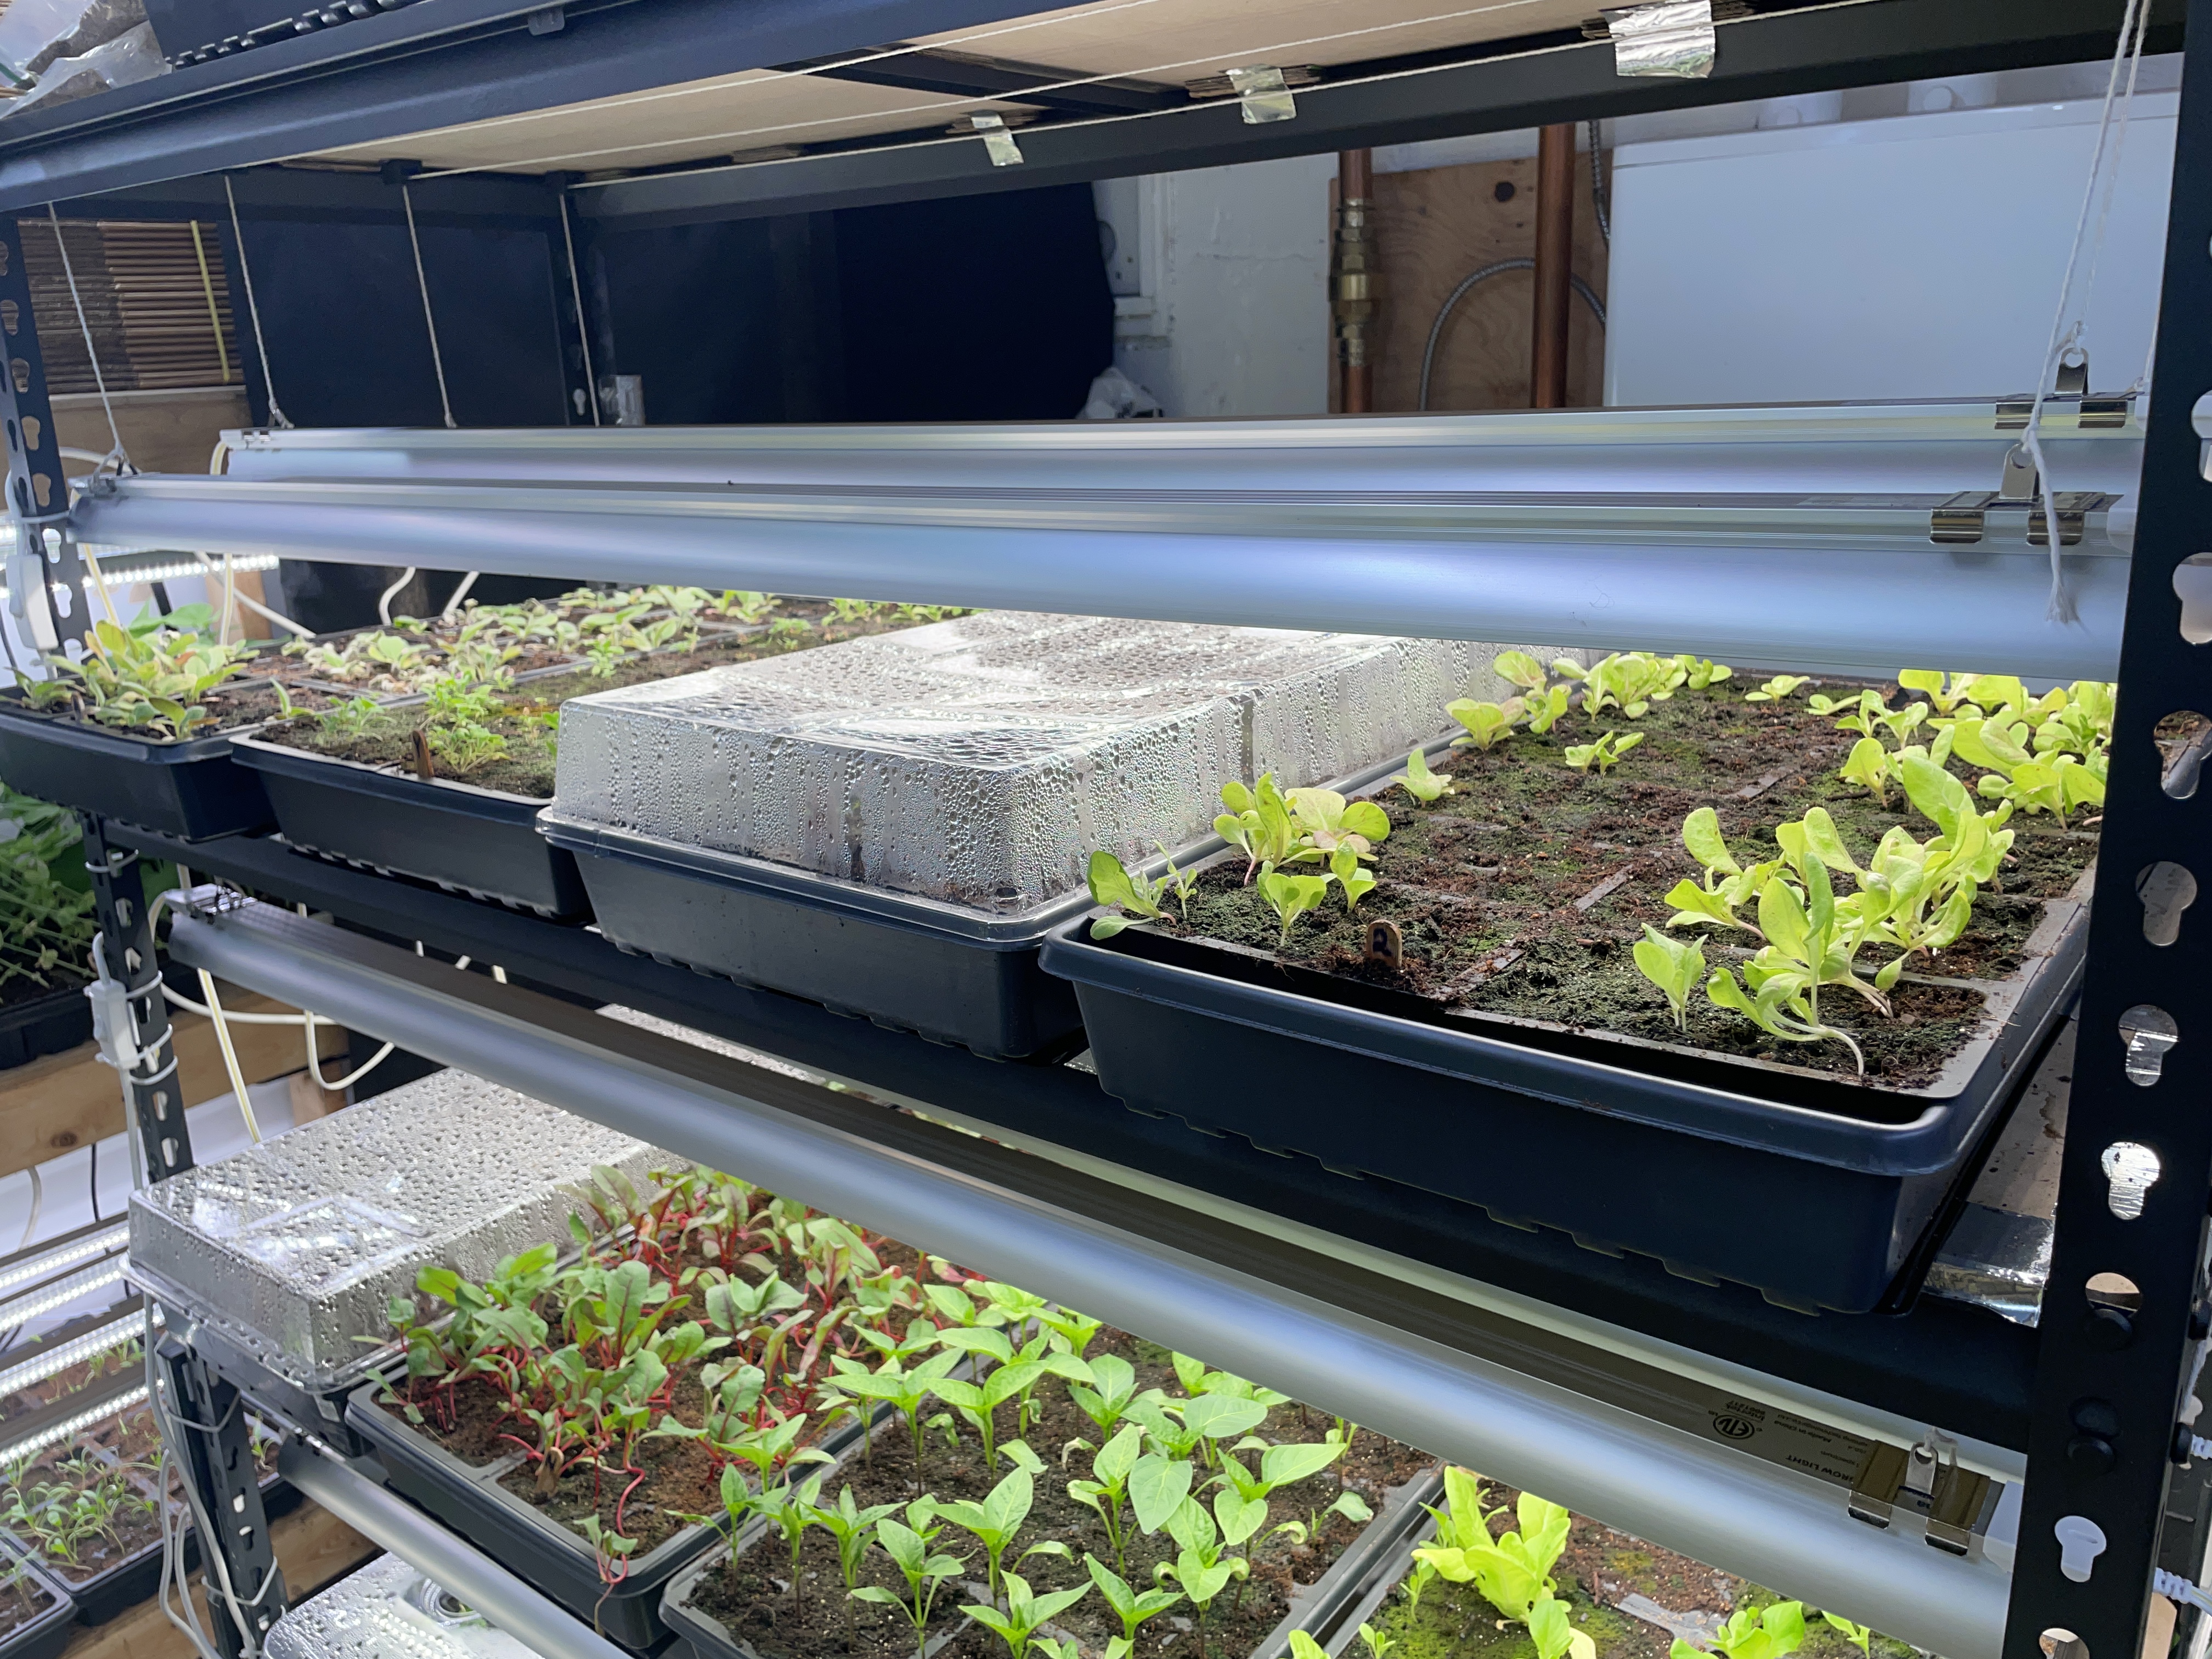
Lighting
I purchased Barrina Grow Lights for all of my lighting this year. Each light is rated at 42W, is full spectrum, and in my case is a warm white color. I am not a fan of the purple lights, so while these are technically less efficient, I was willing to pay the slight premium to have a space I enjoy being in.
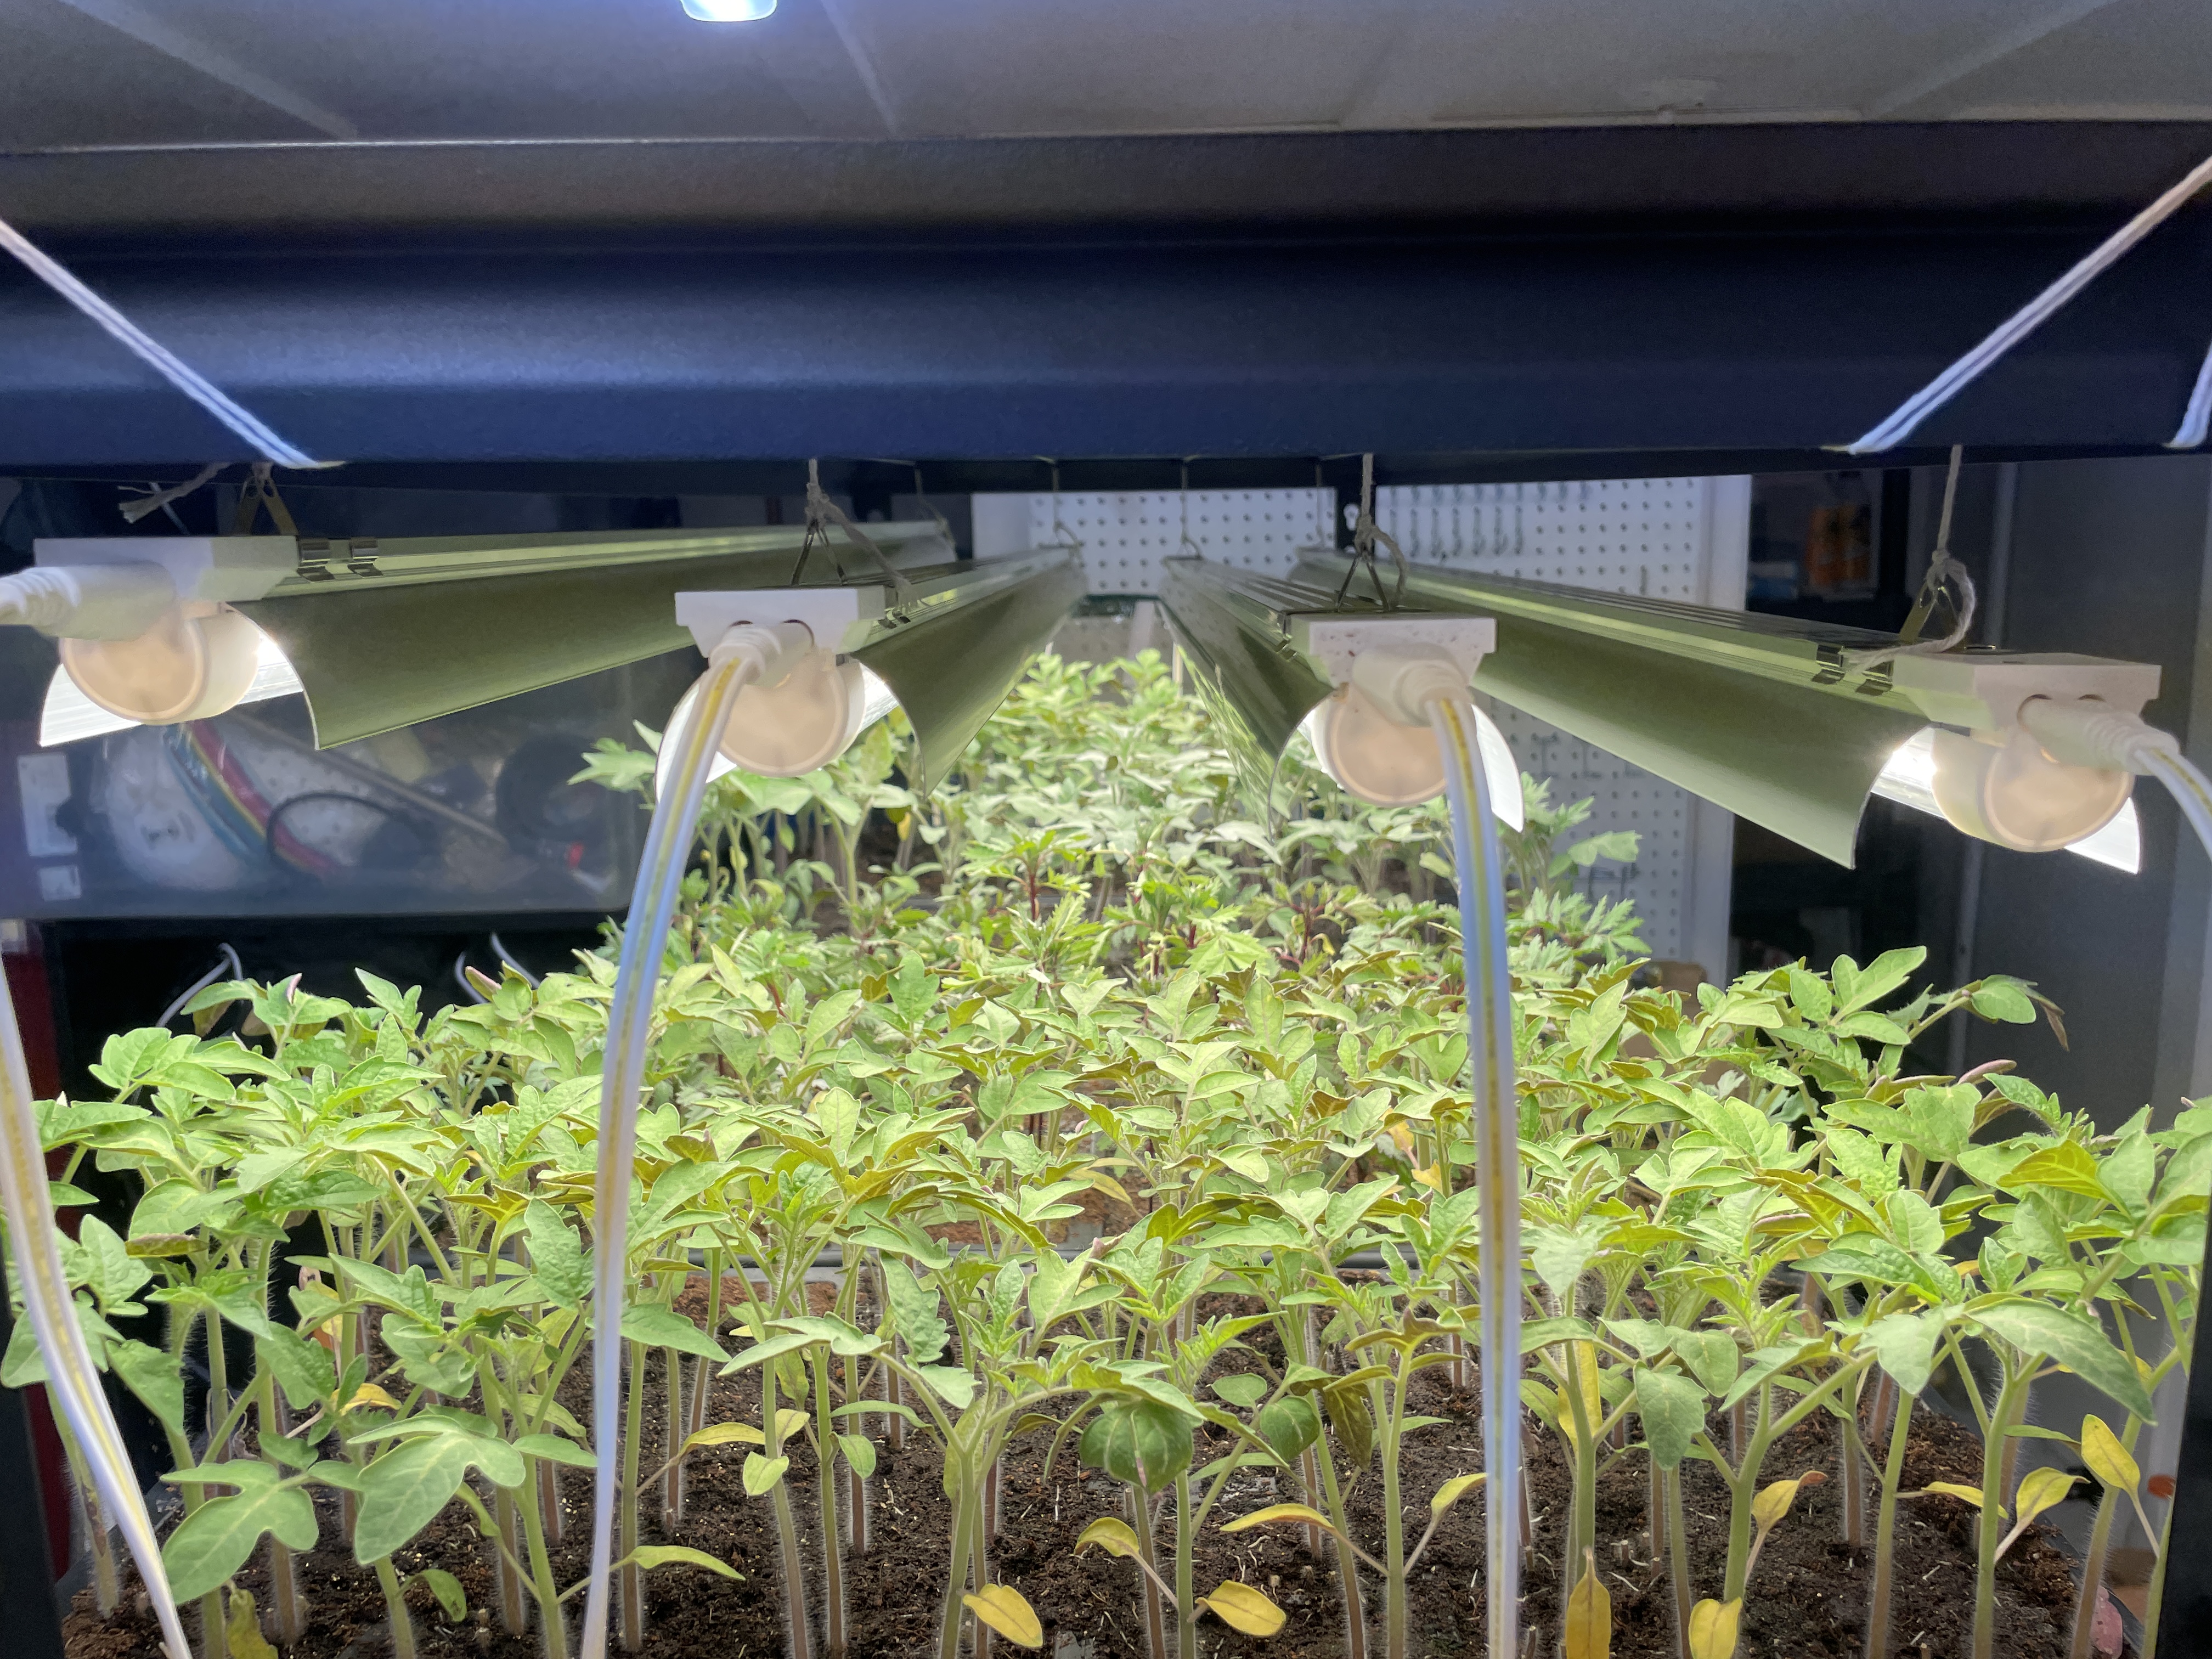
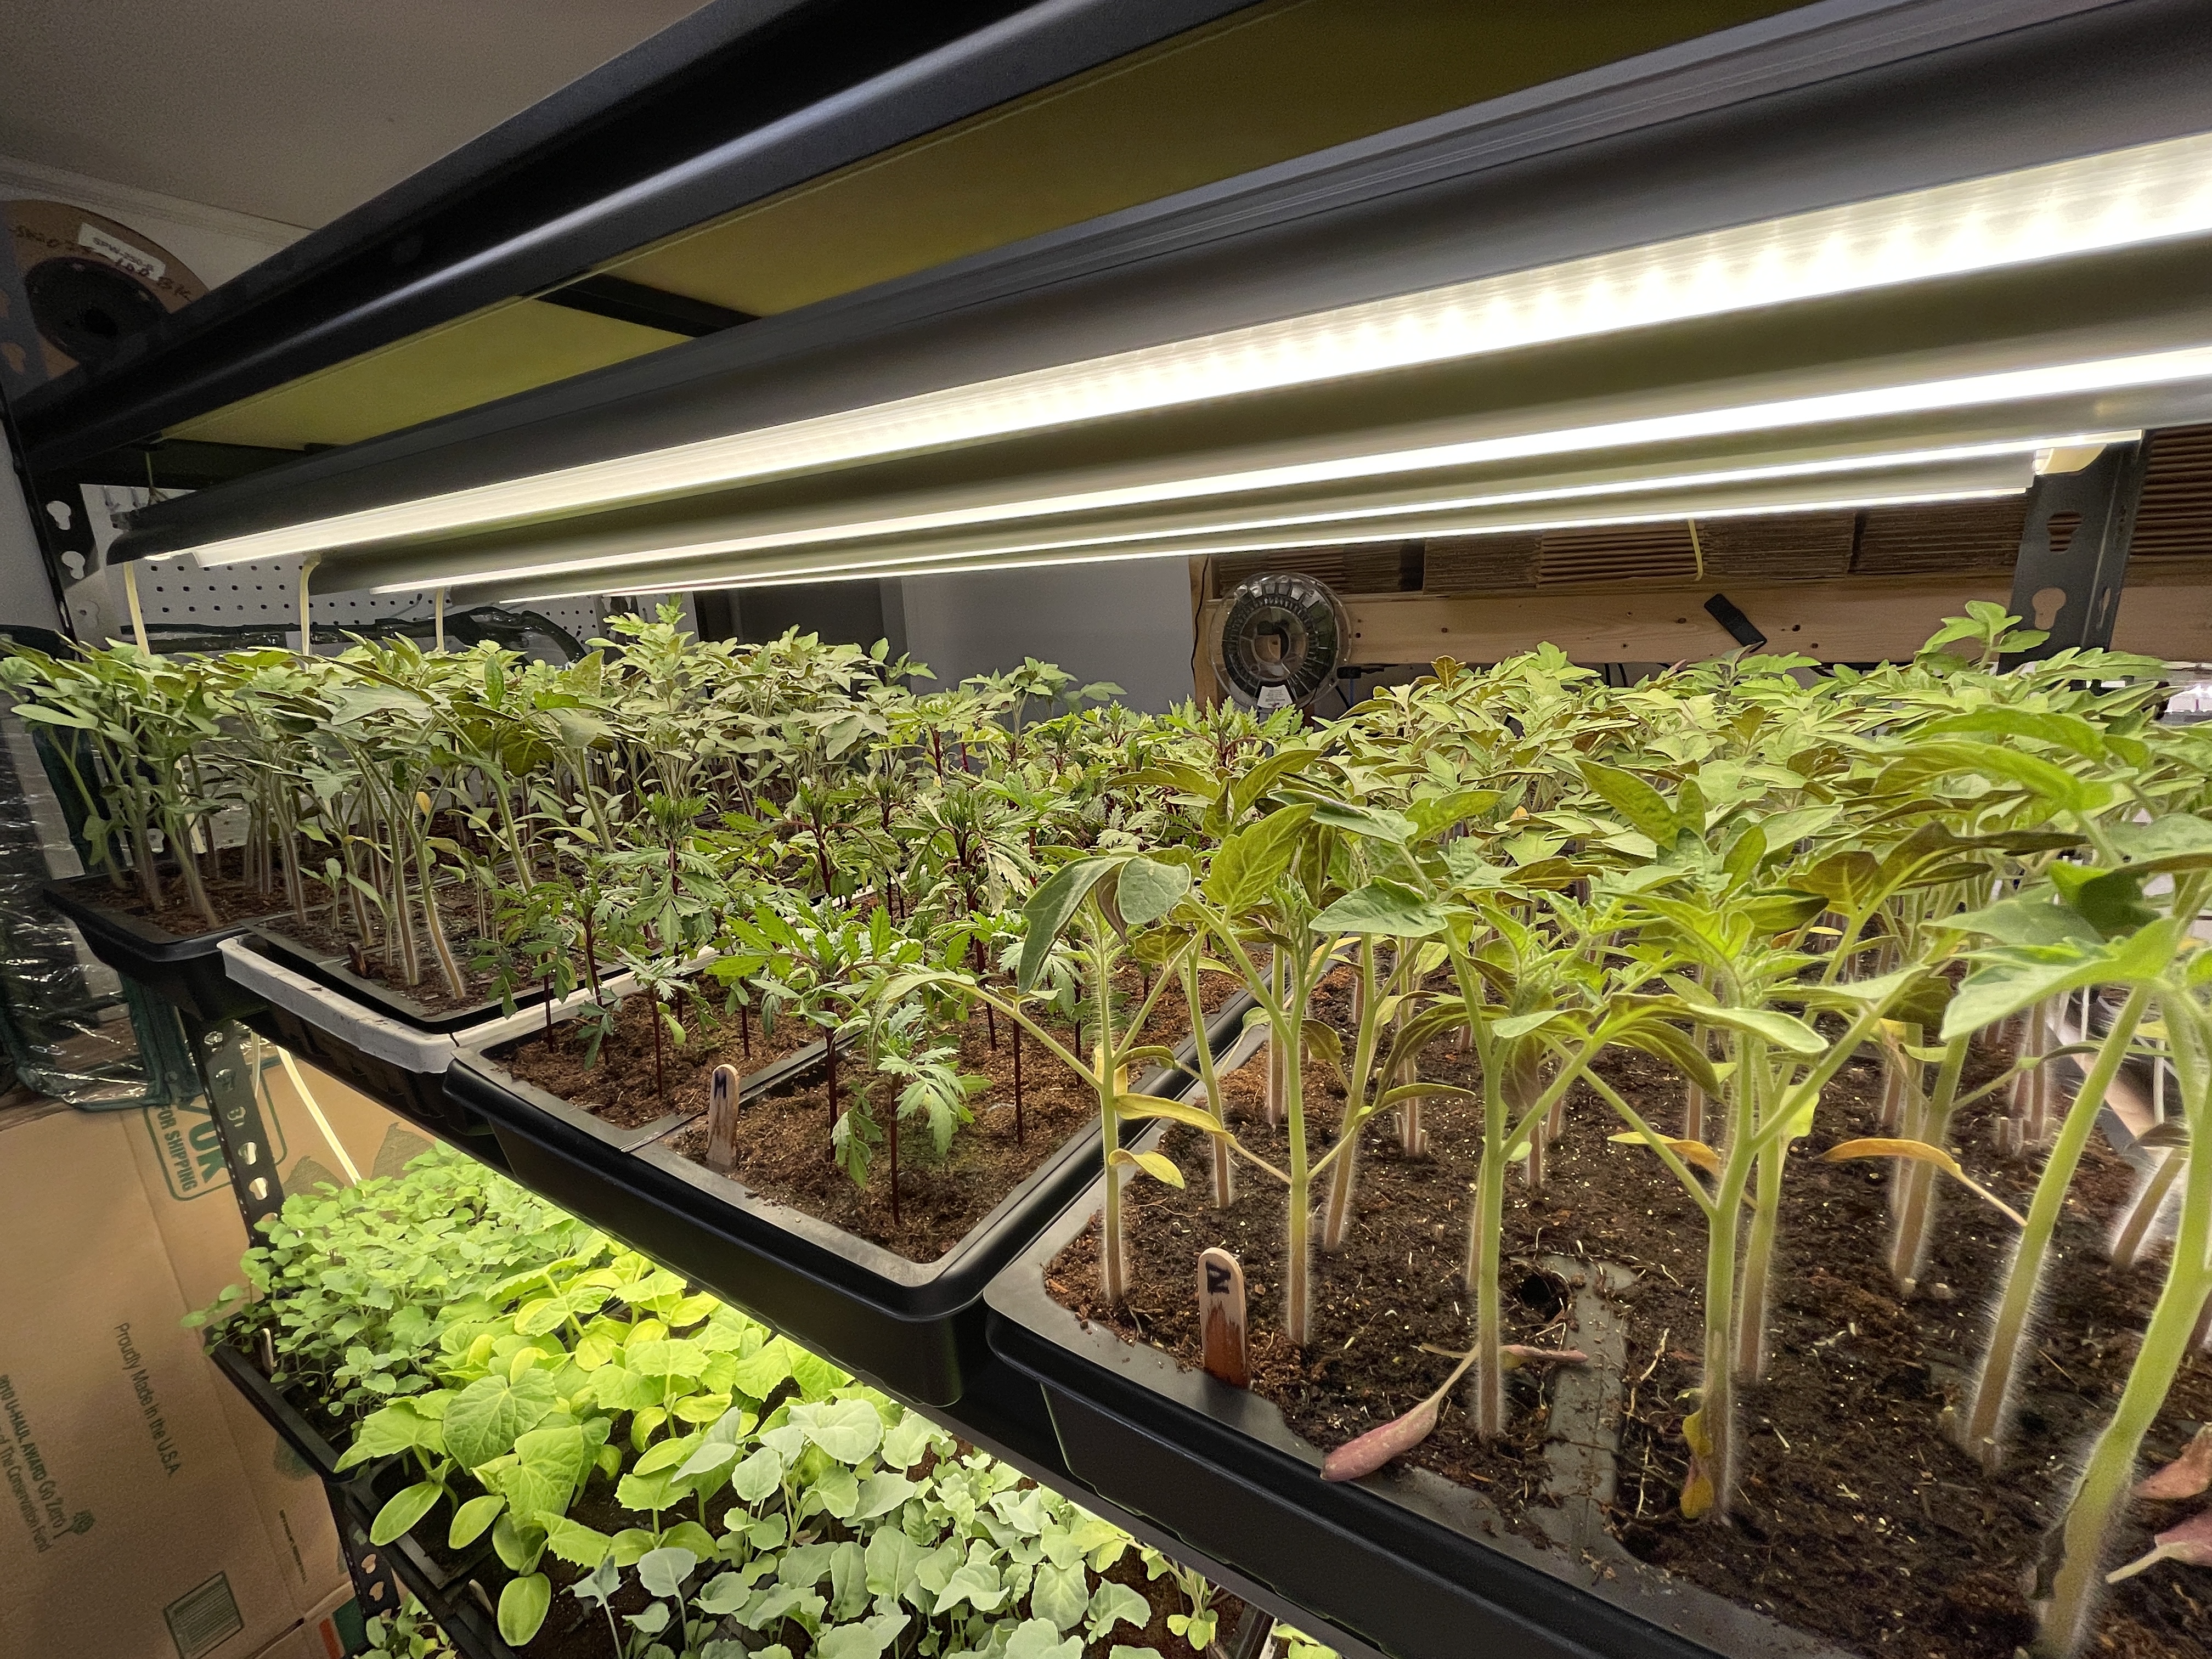
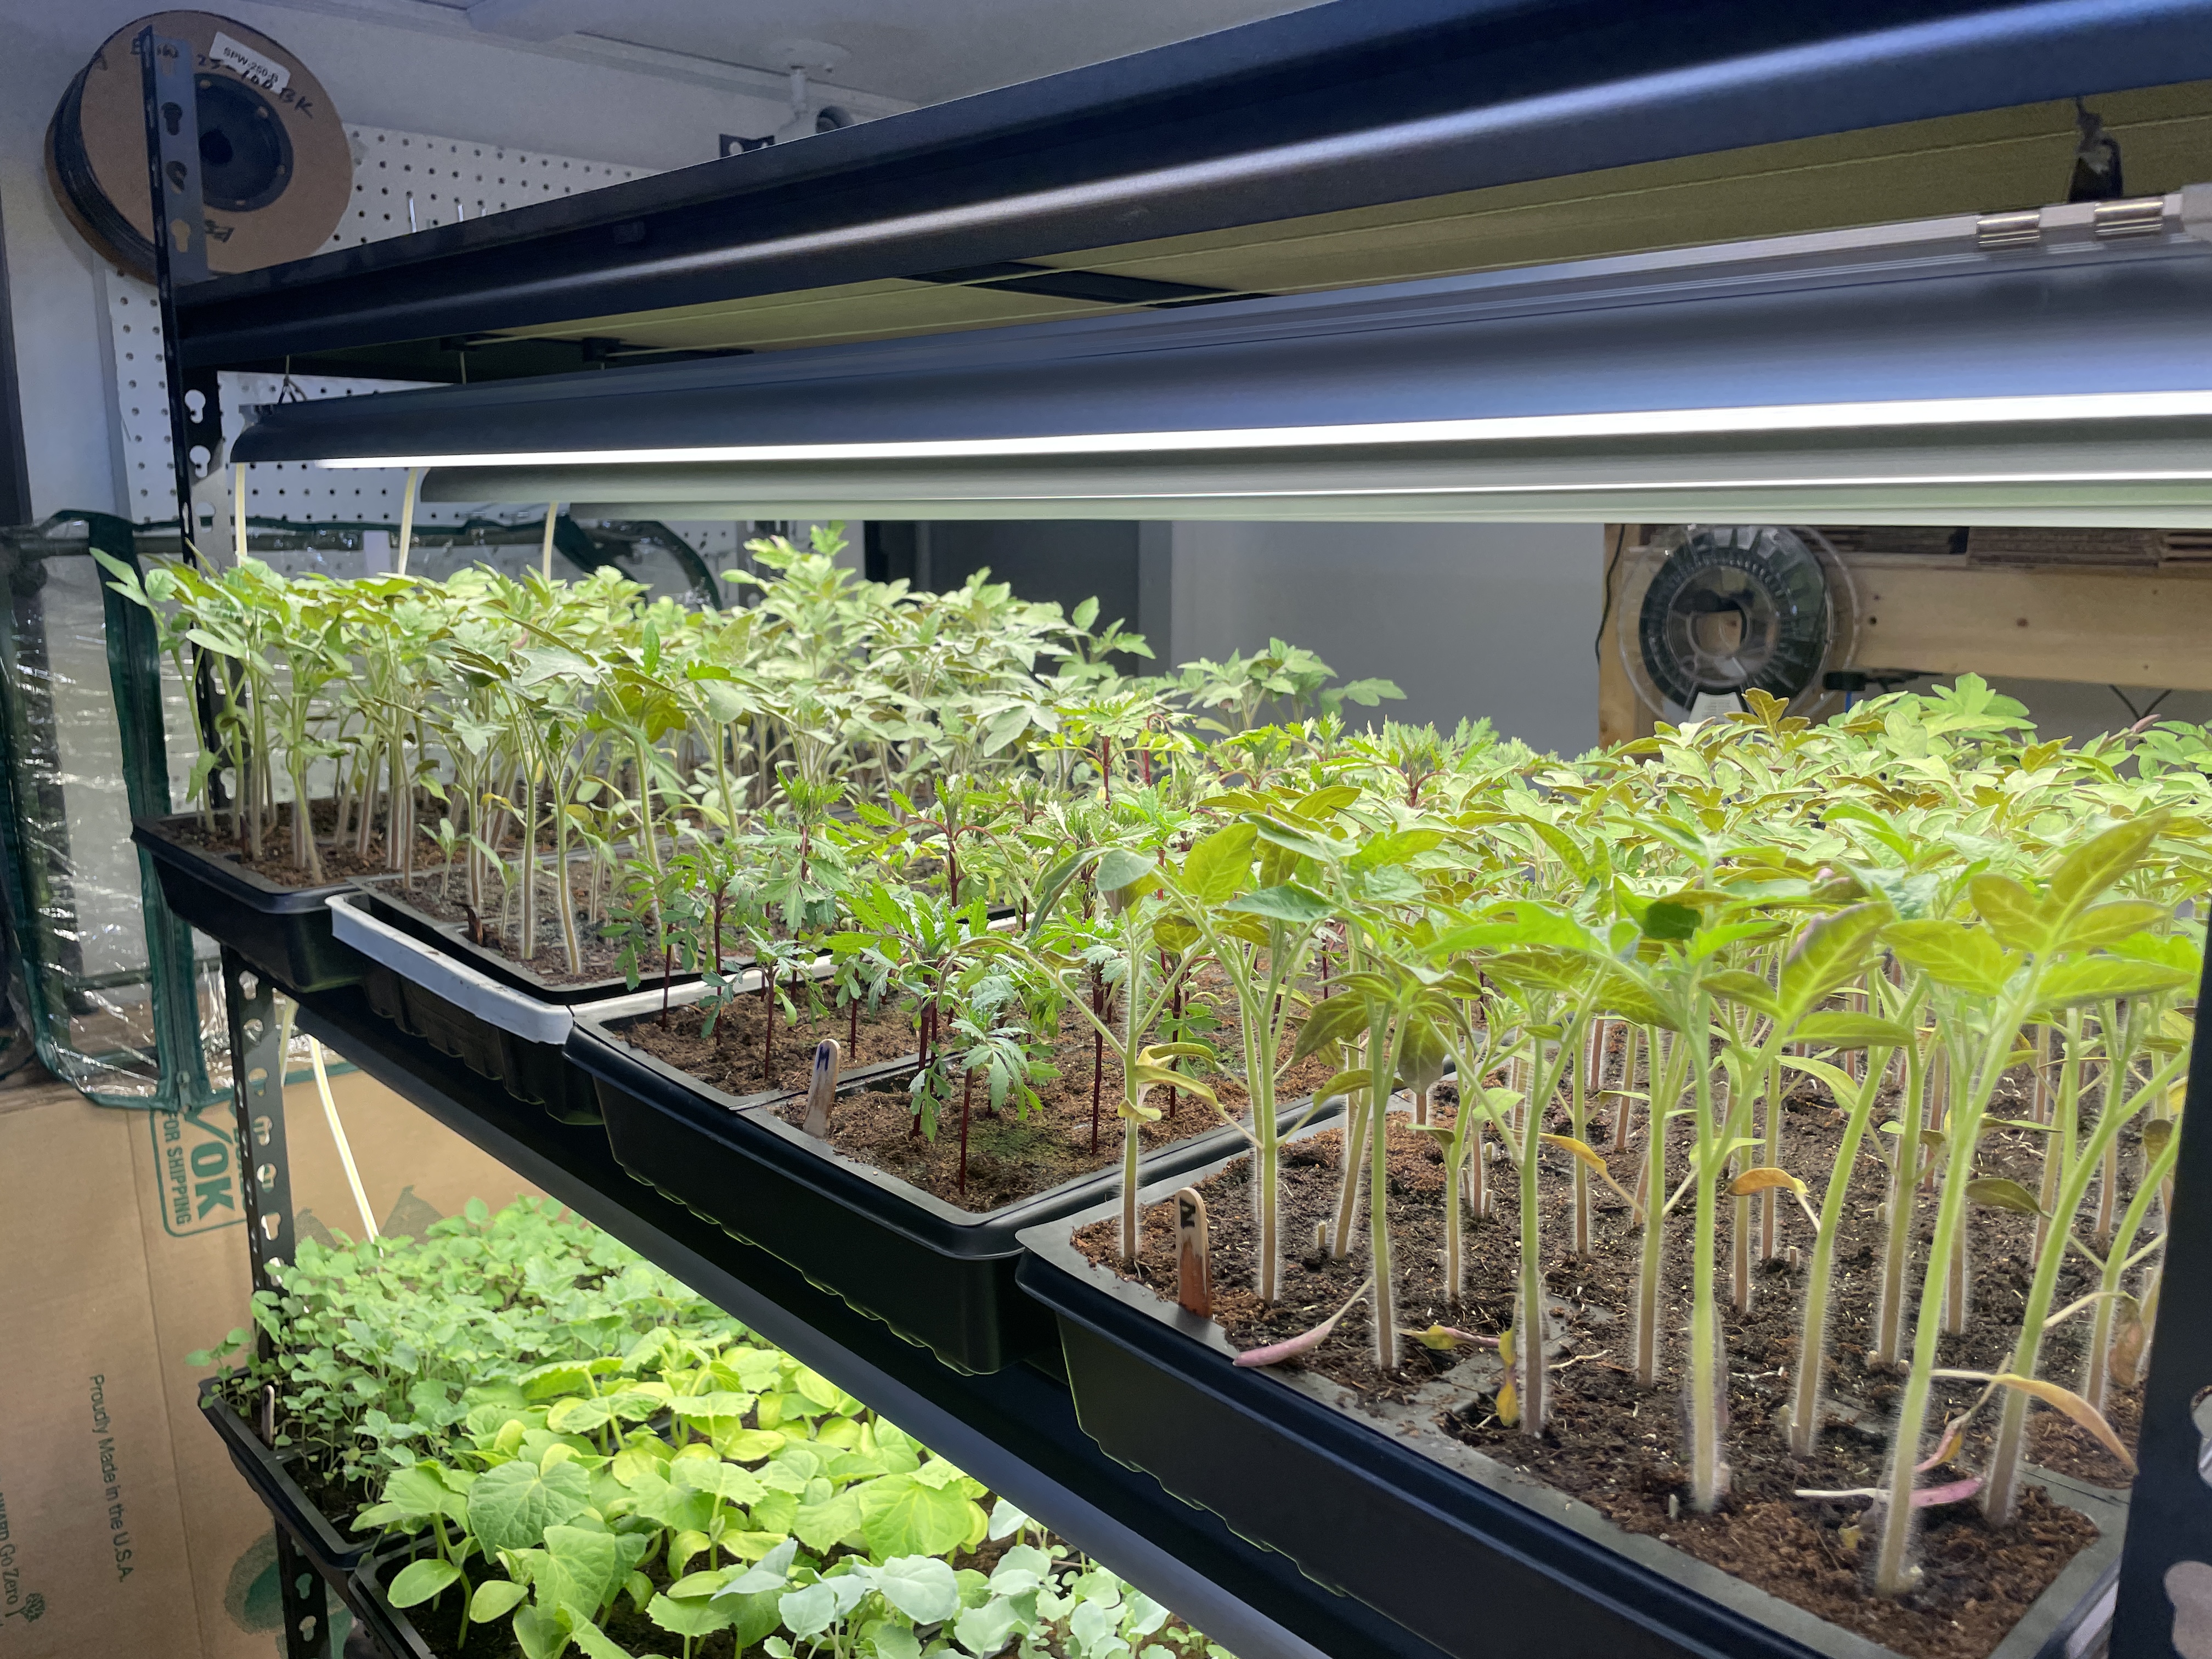
I put four of these lights per shelf, spaced equally apart, and suspended using tomato/garden twine to the underside of the above shelf. I plan to do some tests with different plants in the future to determine if four lights is actually necessary, or if you could get away with three or two.

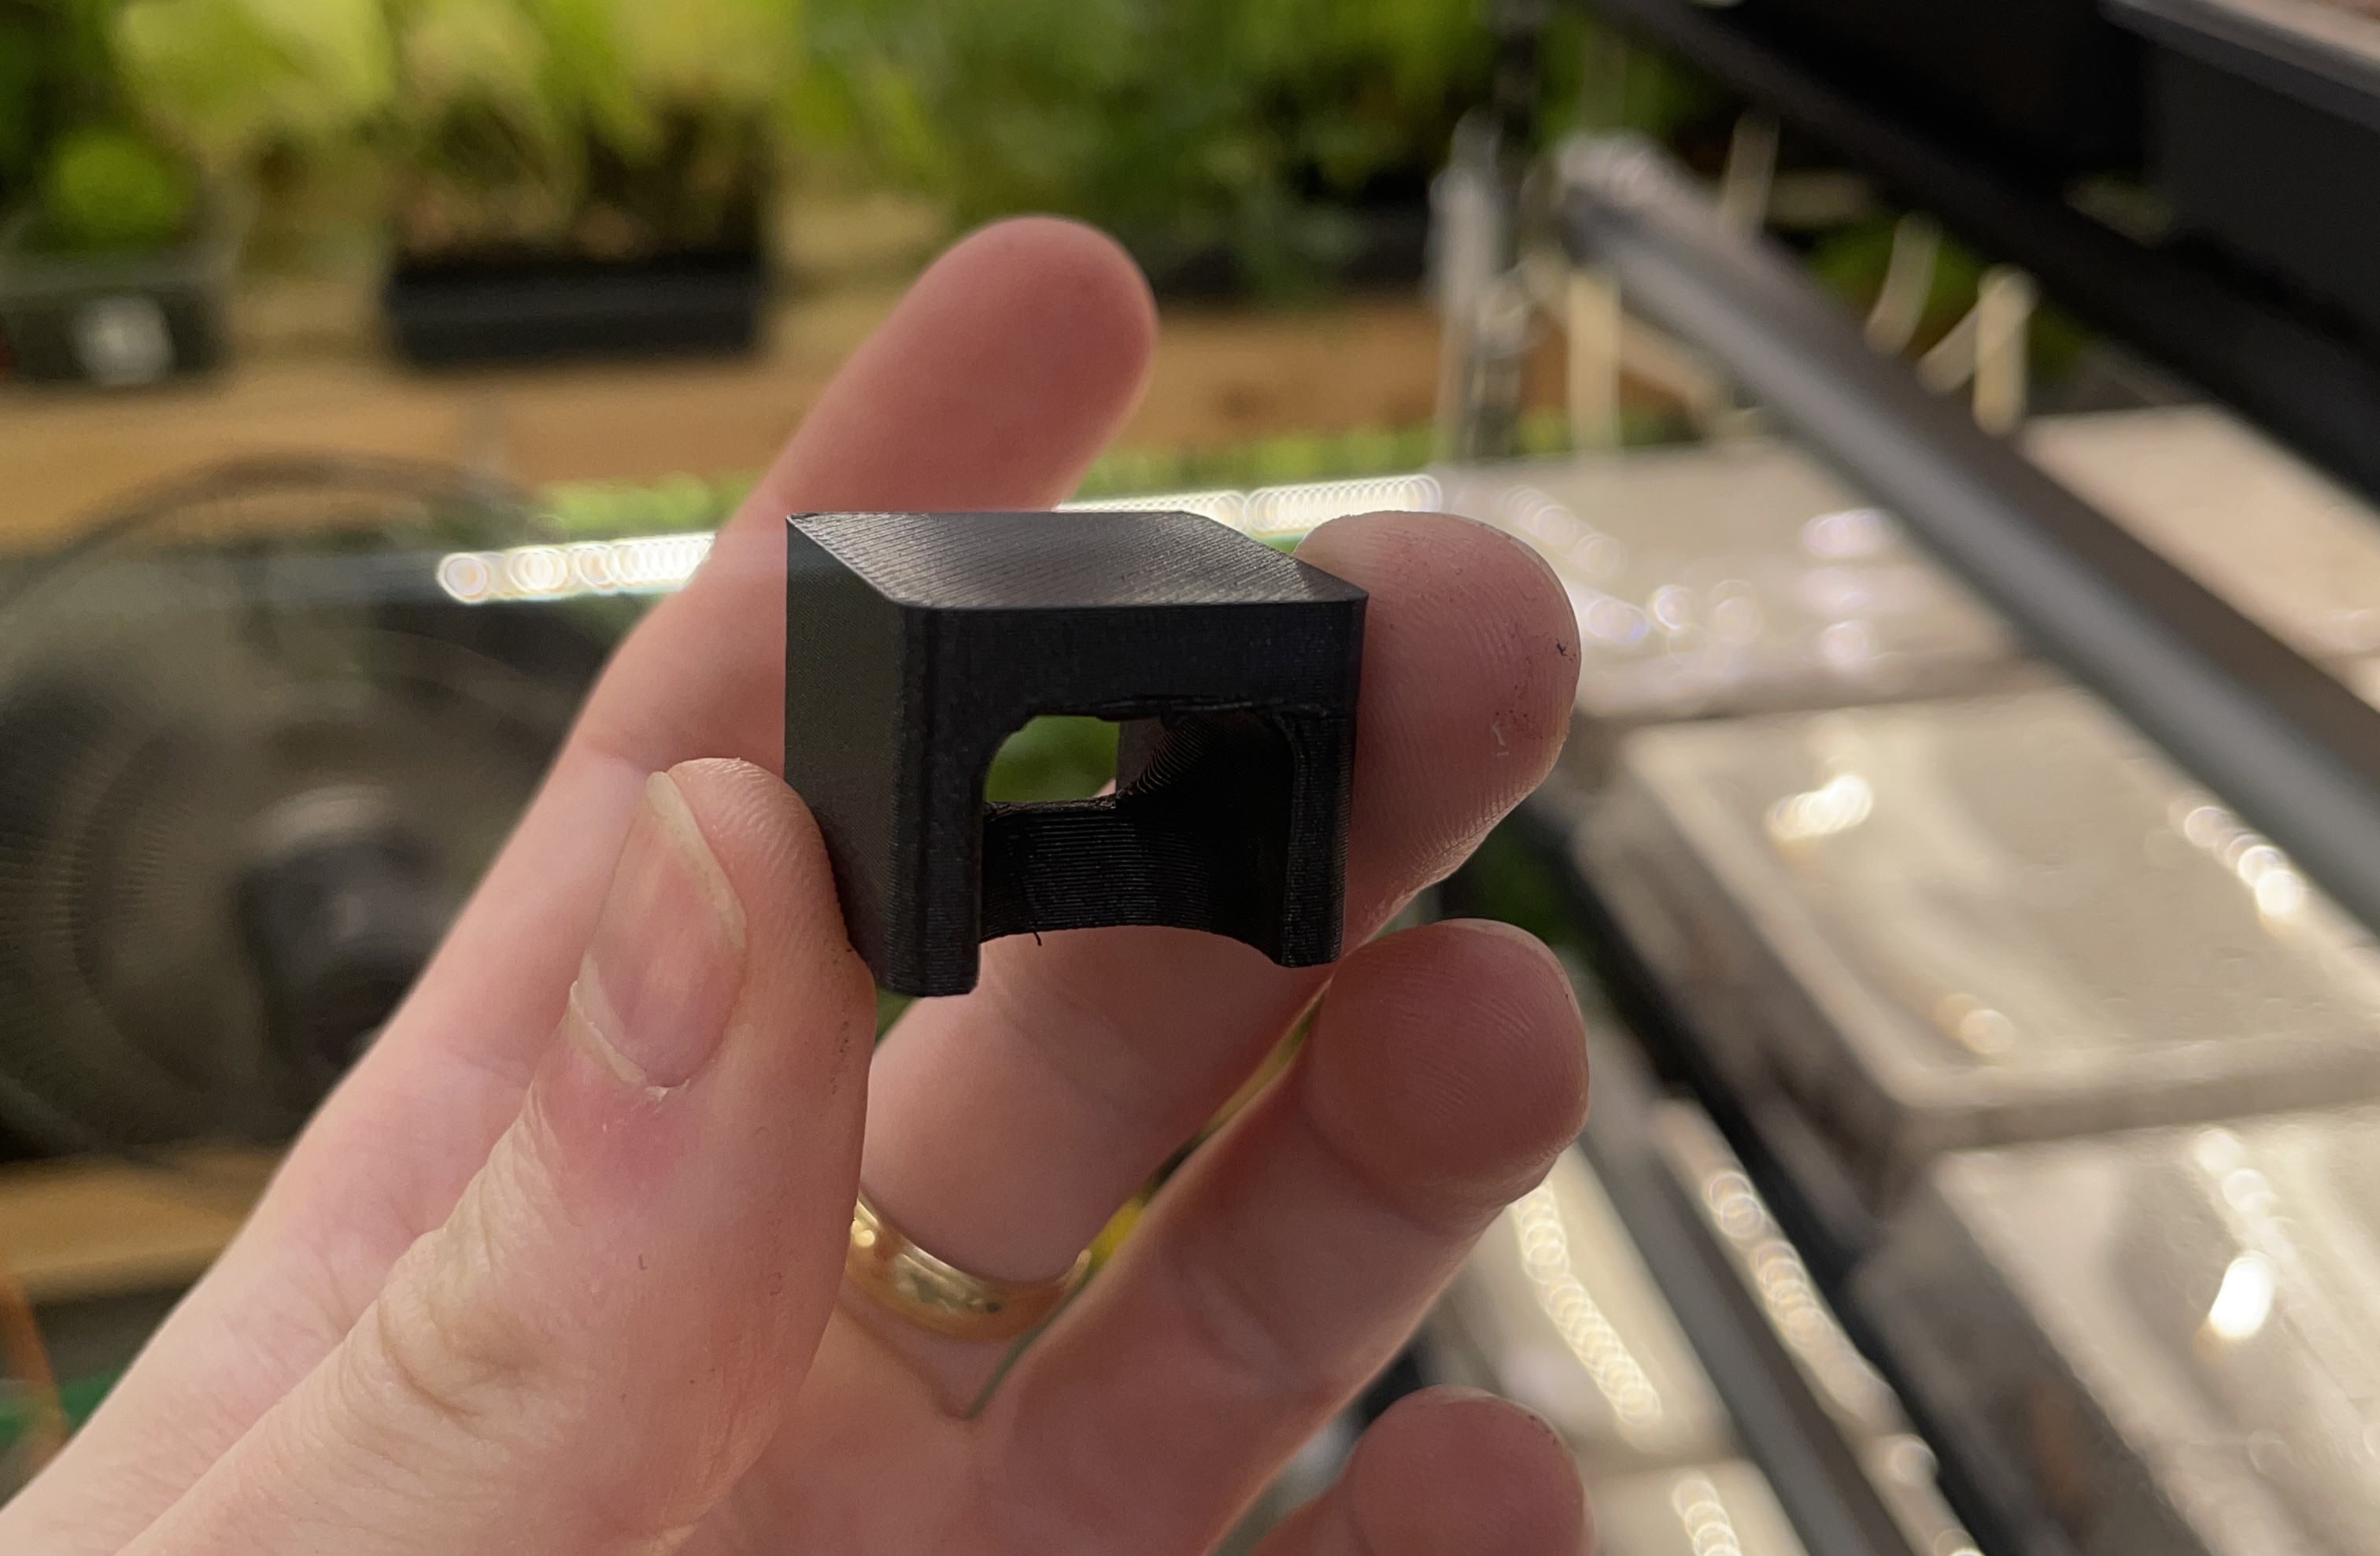
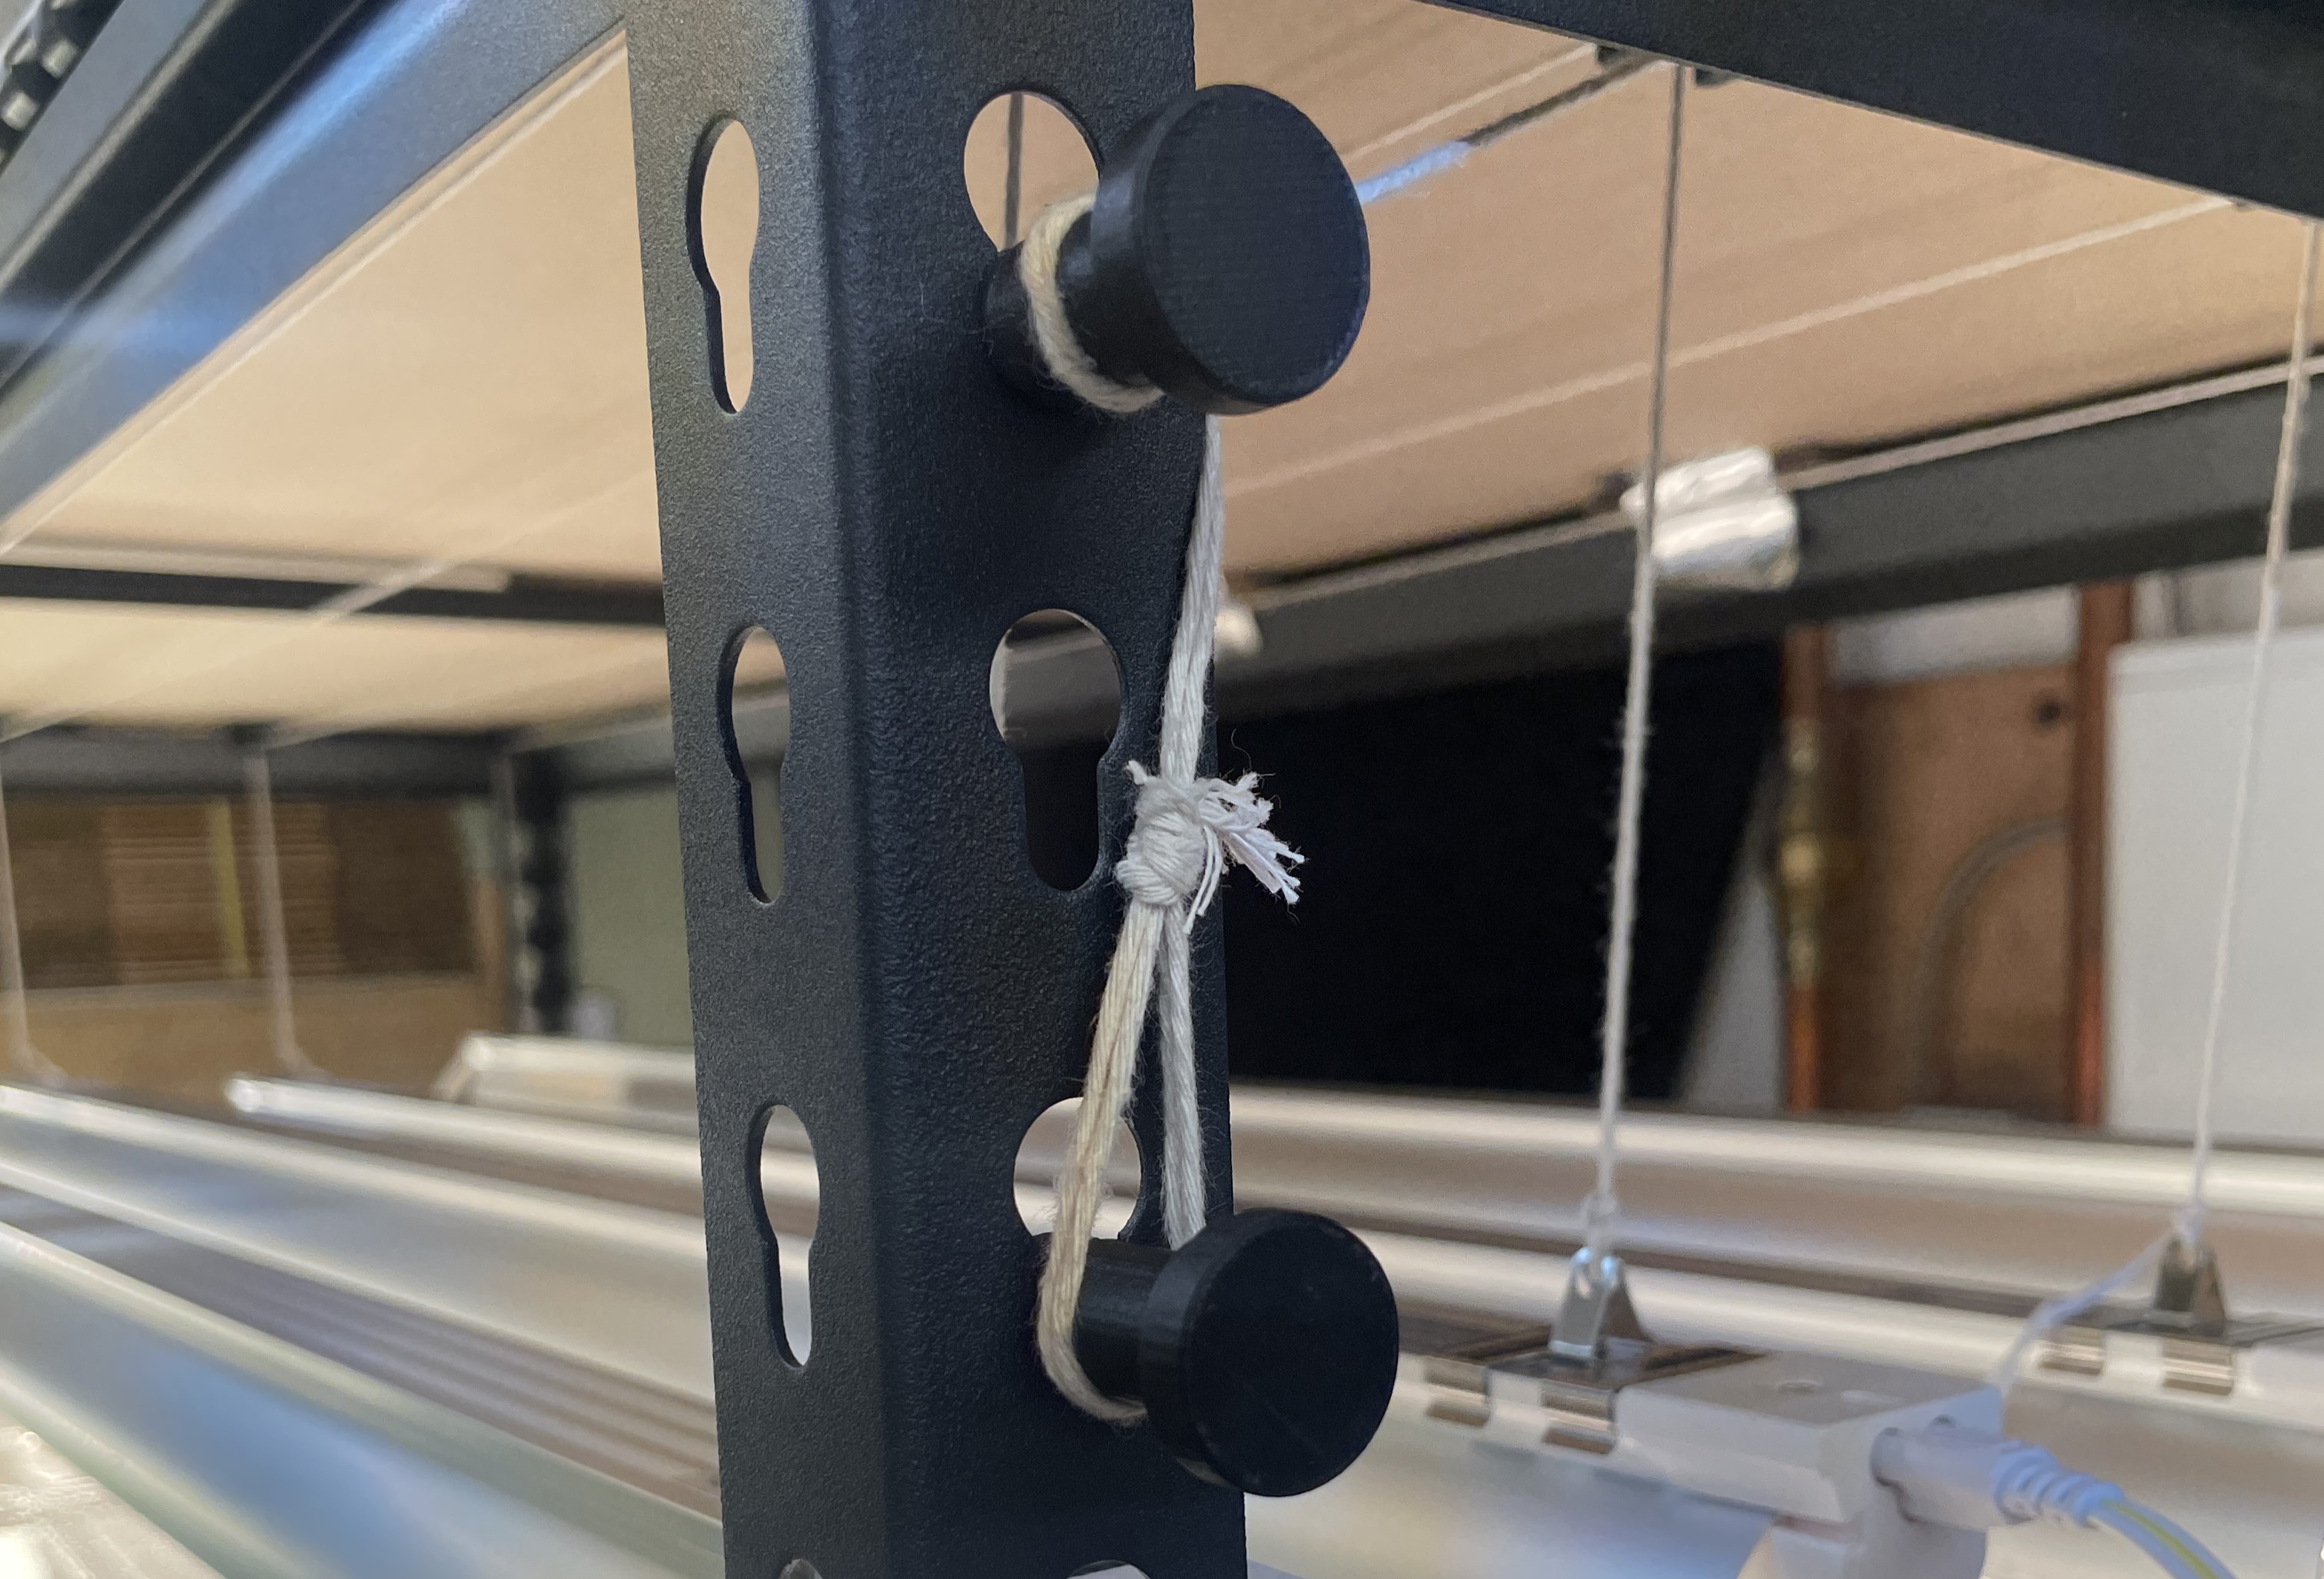
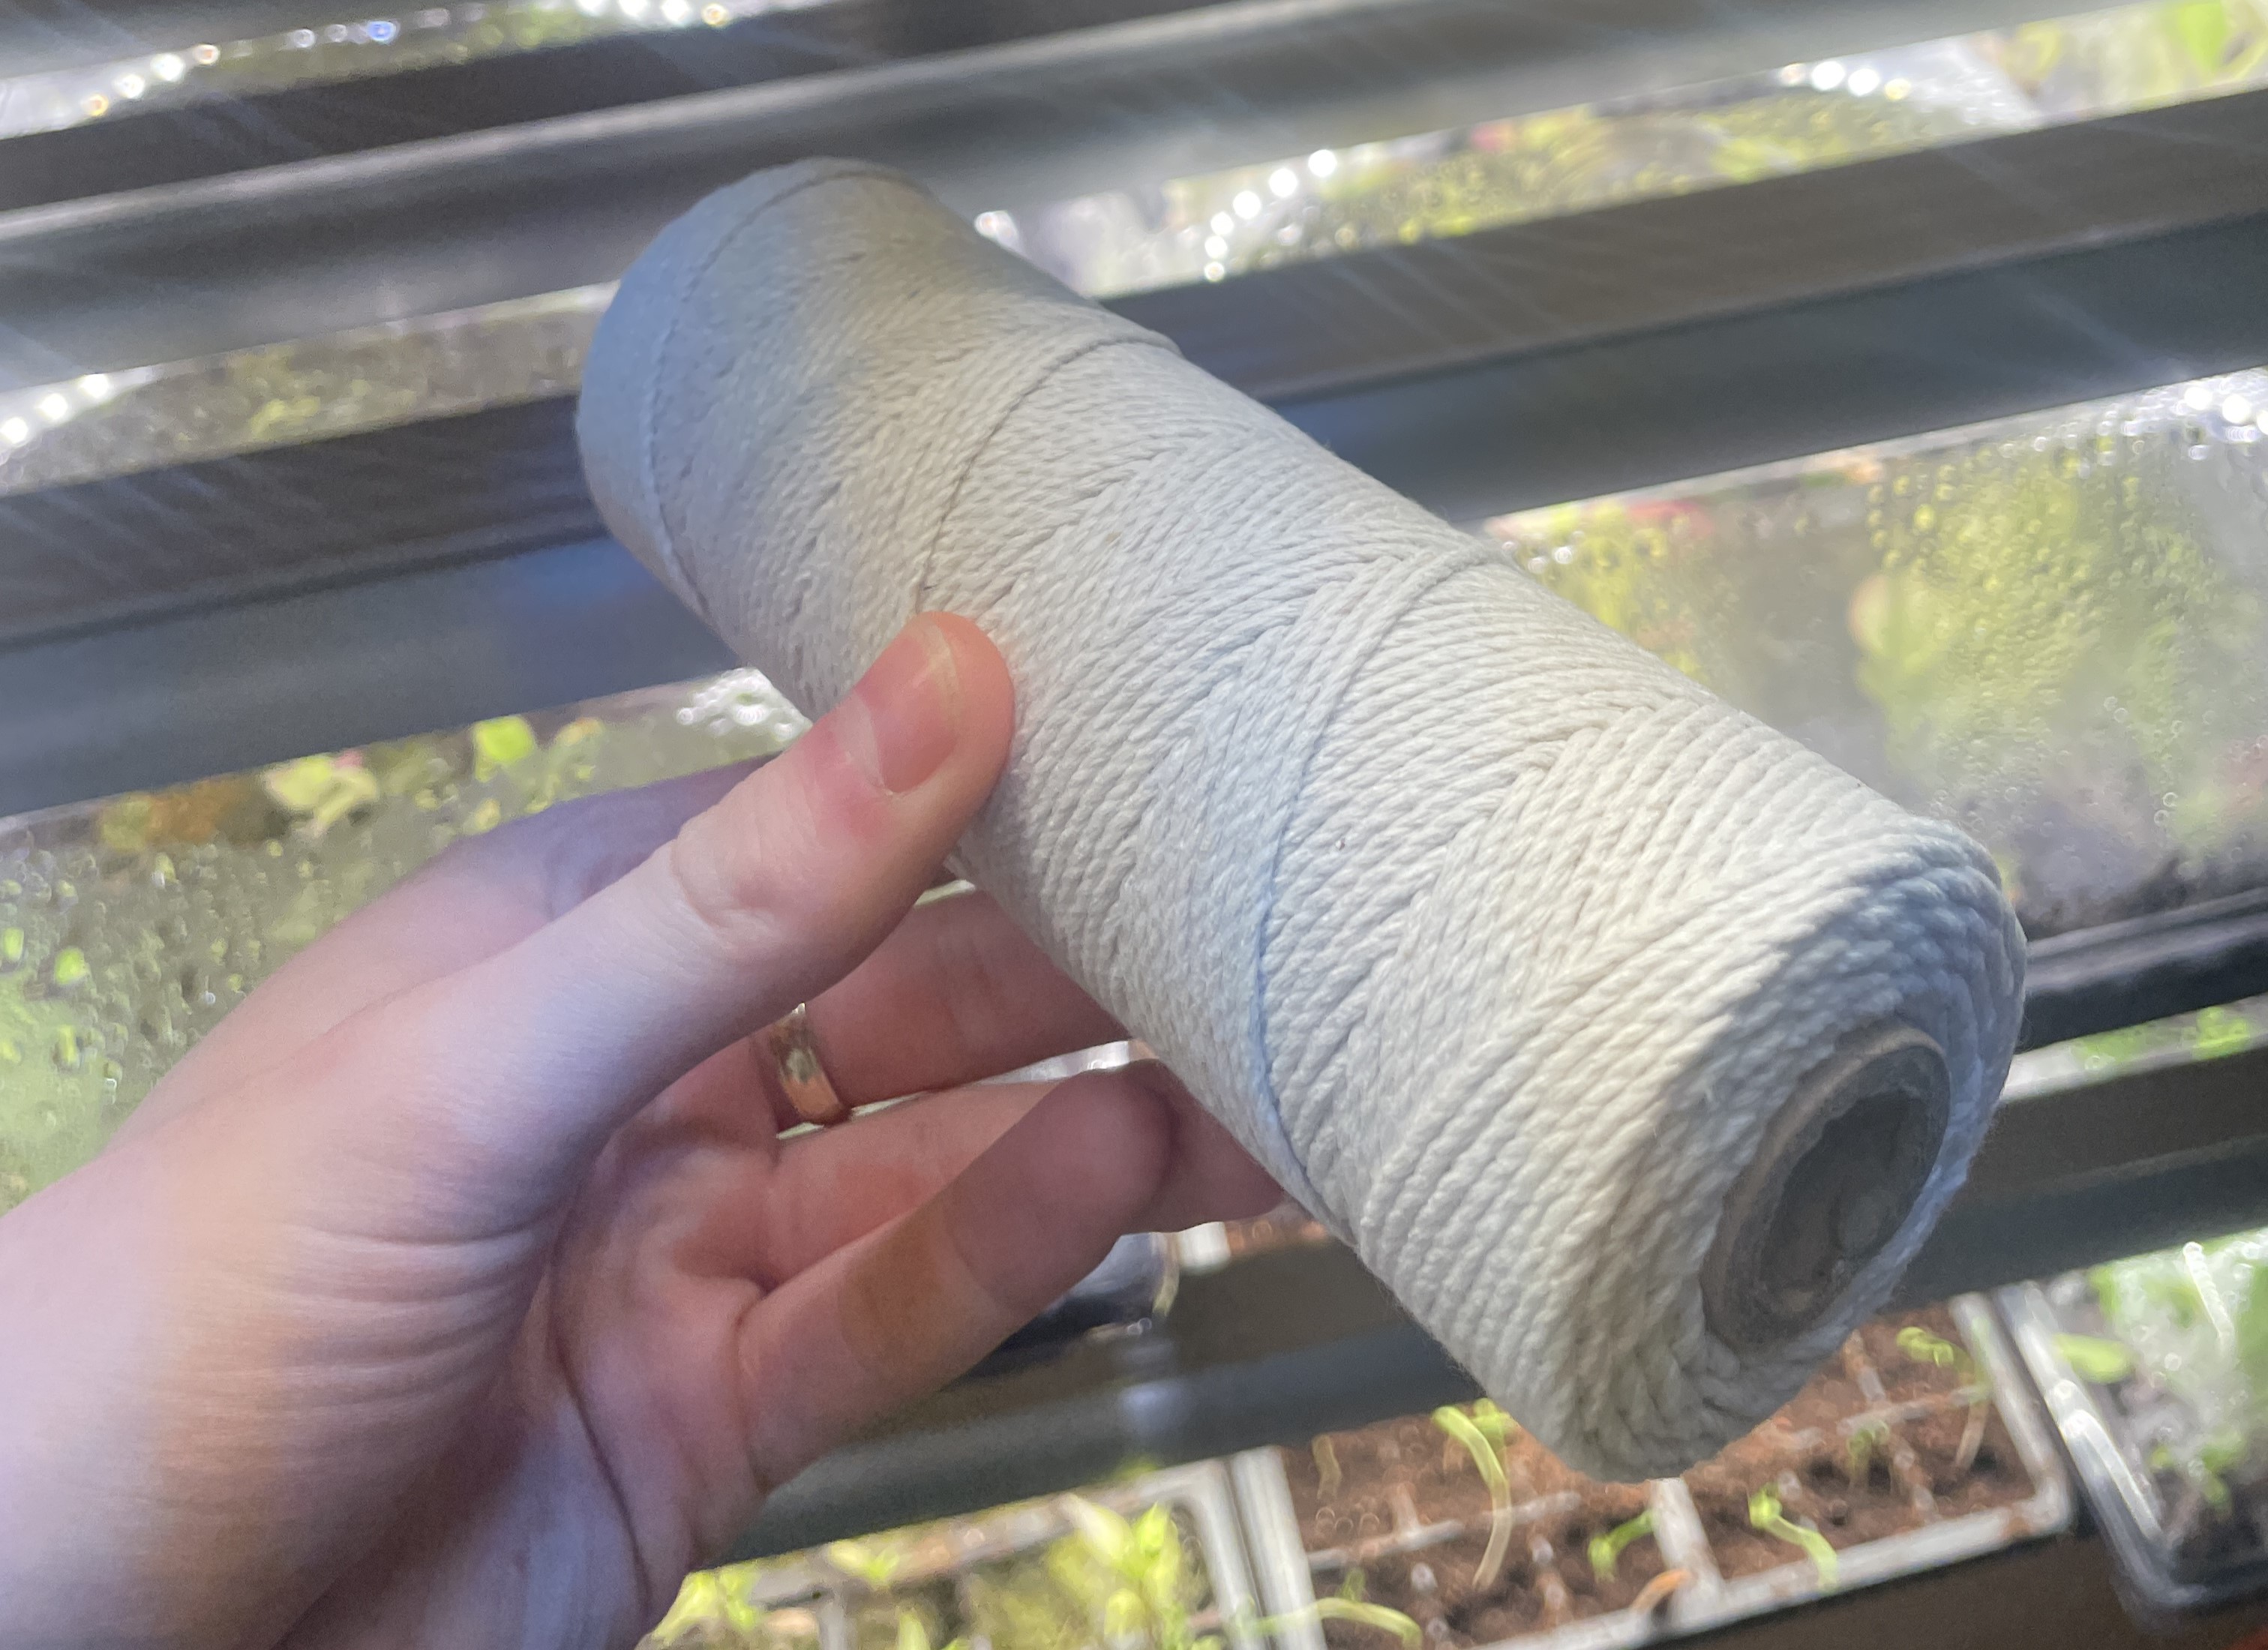
The twine was fed through some 3D printed 'pulleys' that I designed to be hot glued to the underside of the above shelf. The twine then runs to one side of the shelf, where I tie it to the other string for the given light, into a loop to be wrapped around the pegs I also designed to fit into the existing slots on the shelves.
If you would like to print either of the pulleys or the pegs, you can find the files here here and here.
Alternatively, if you would like for me to print some for you, please contact me directly.
These lights have gotten rather expensive, at $25 a piece. If you are interested in joining in a group purchase, I plan to import my own lights from the manufacturer in China for about half that for next season.
The lights can be strung together, up to 6 at a time, and powered via a single switch/coord. I have been very happy with them thus far, but I would recommend you get the model with the reflectors. In all the lights I've purchased, I have only ever received one which died, which was due to a wire which was improperly soldered. Took me less than 5 minutes to fix it, so that is definitely an option in the unlikely even that yours breaks & you happen to know how to solder.
Overall, the build quality seems very good, with extruded aluminum for the backing (heatsink and mount) and the reflectors. The end caps are plastic, as well as the lense. The plants so far have loved them, even flowering in the case of the marigolds (and beans growing for the bean plants).
Power Distribution
Each light consumes 42w of power, and each heating pad consumes 10w. In my case, I have a series of power bars and power timers which I am using to power each setup. Here's a bit of info on how I have it all set up.
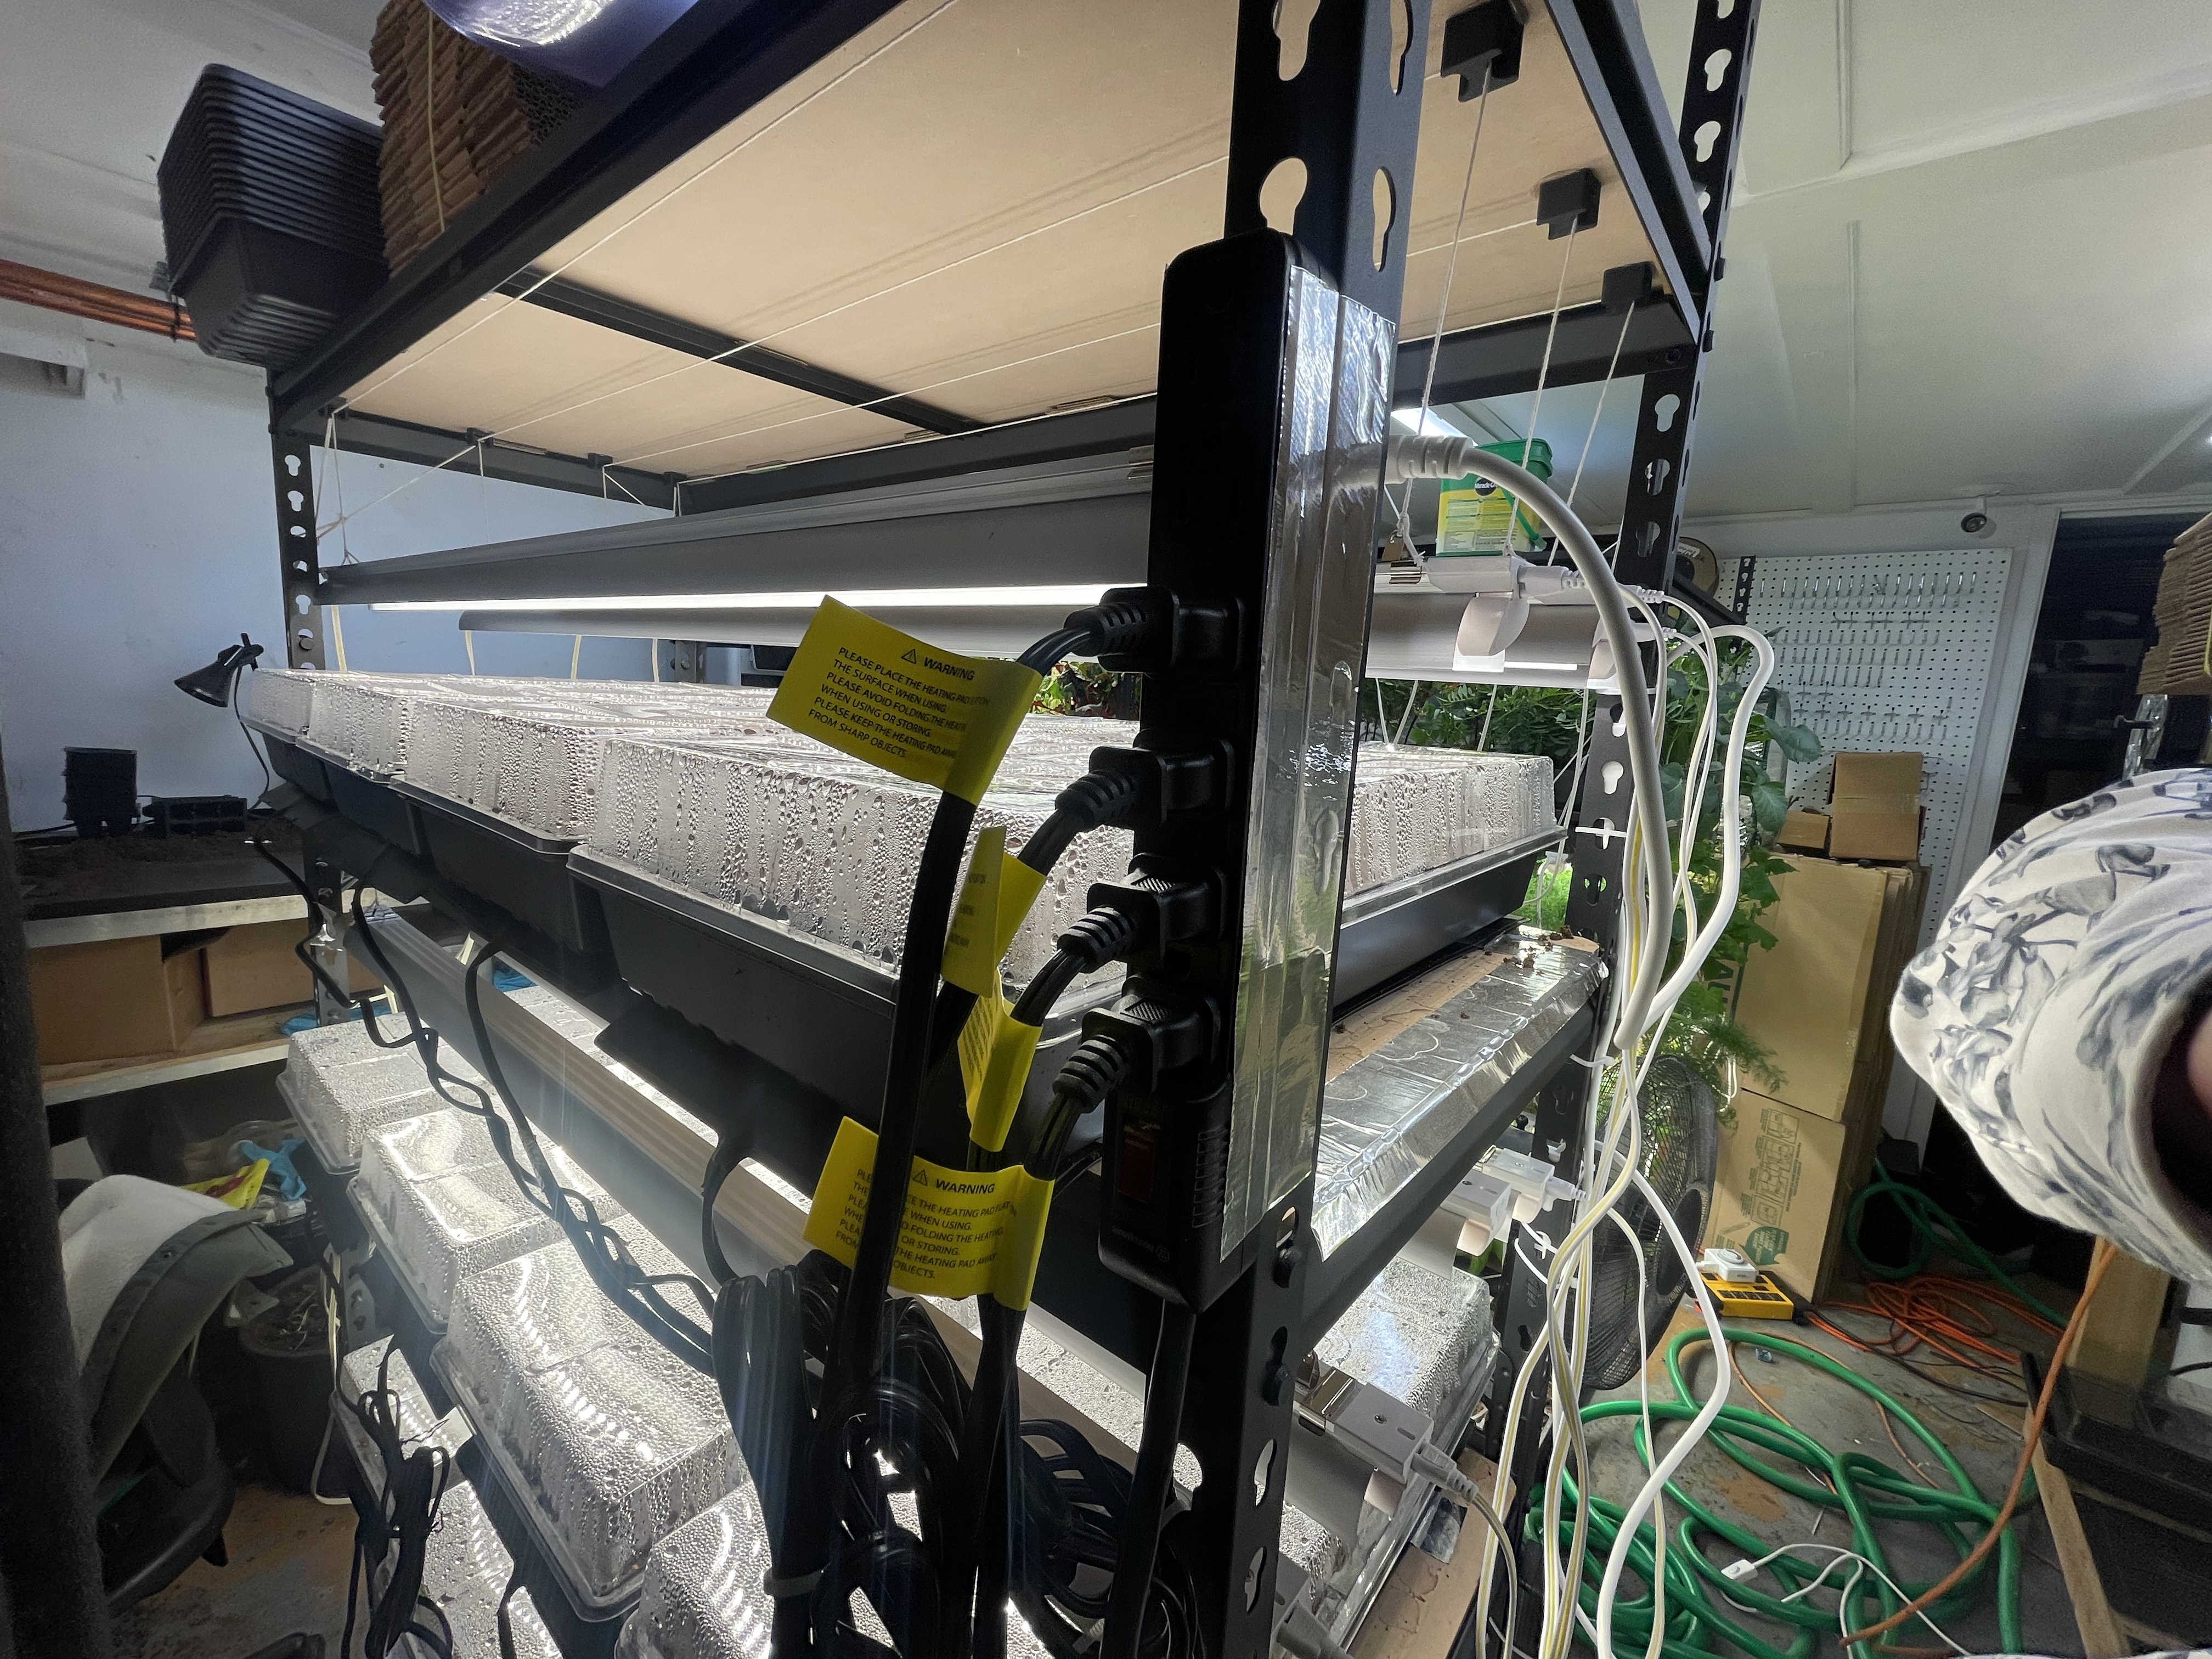
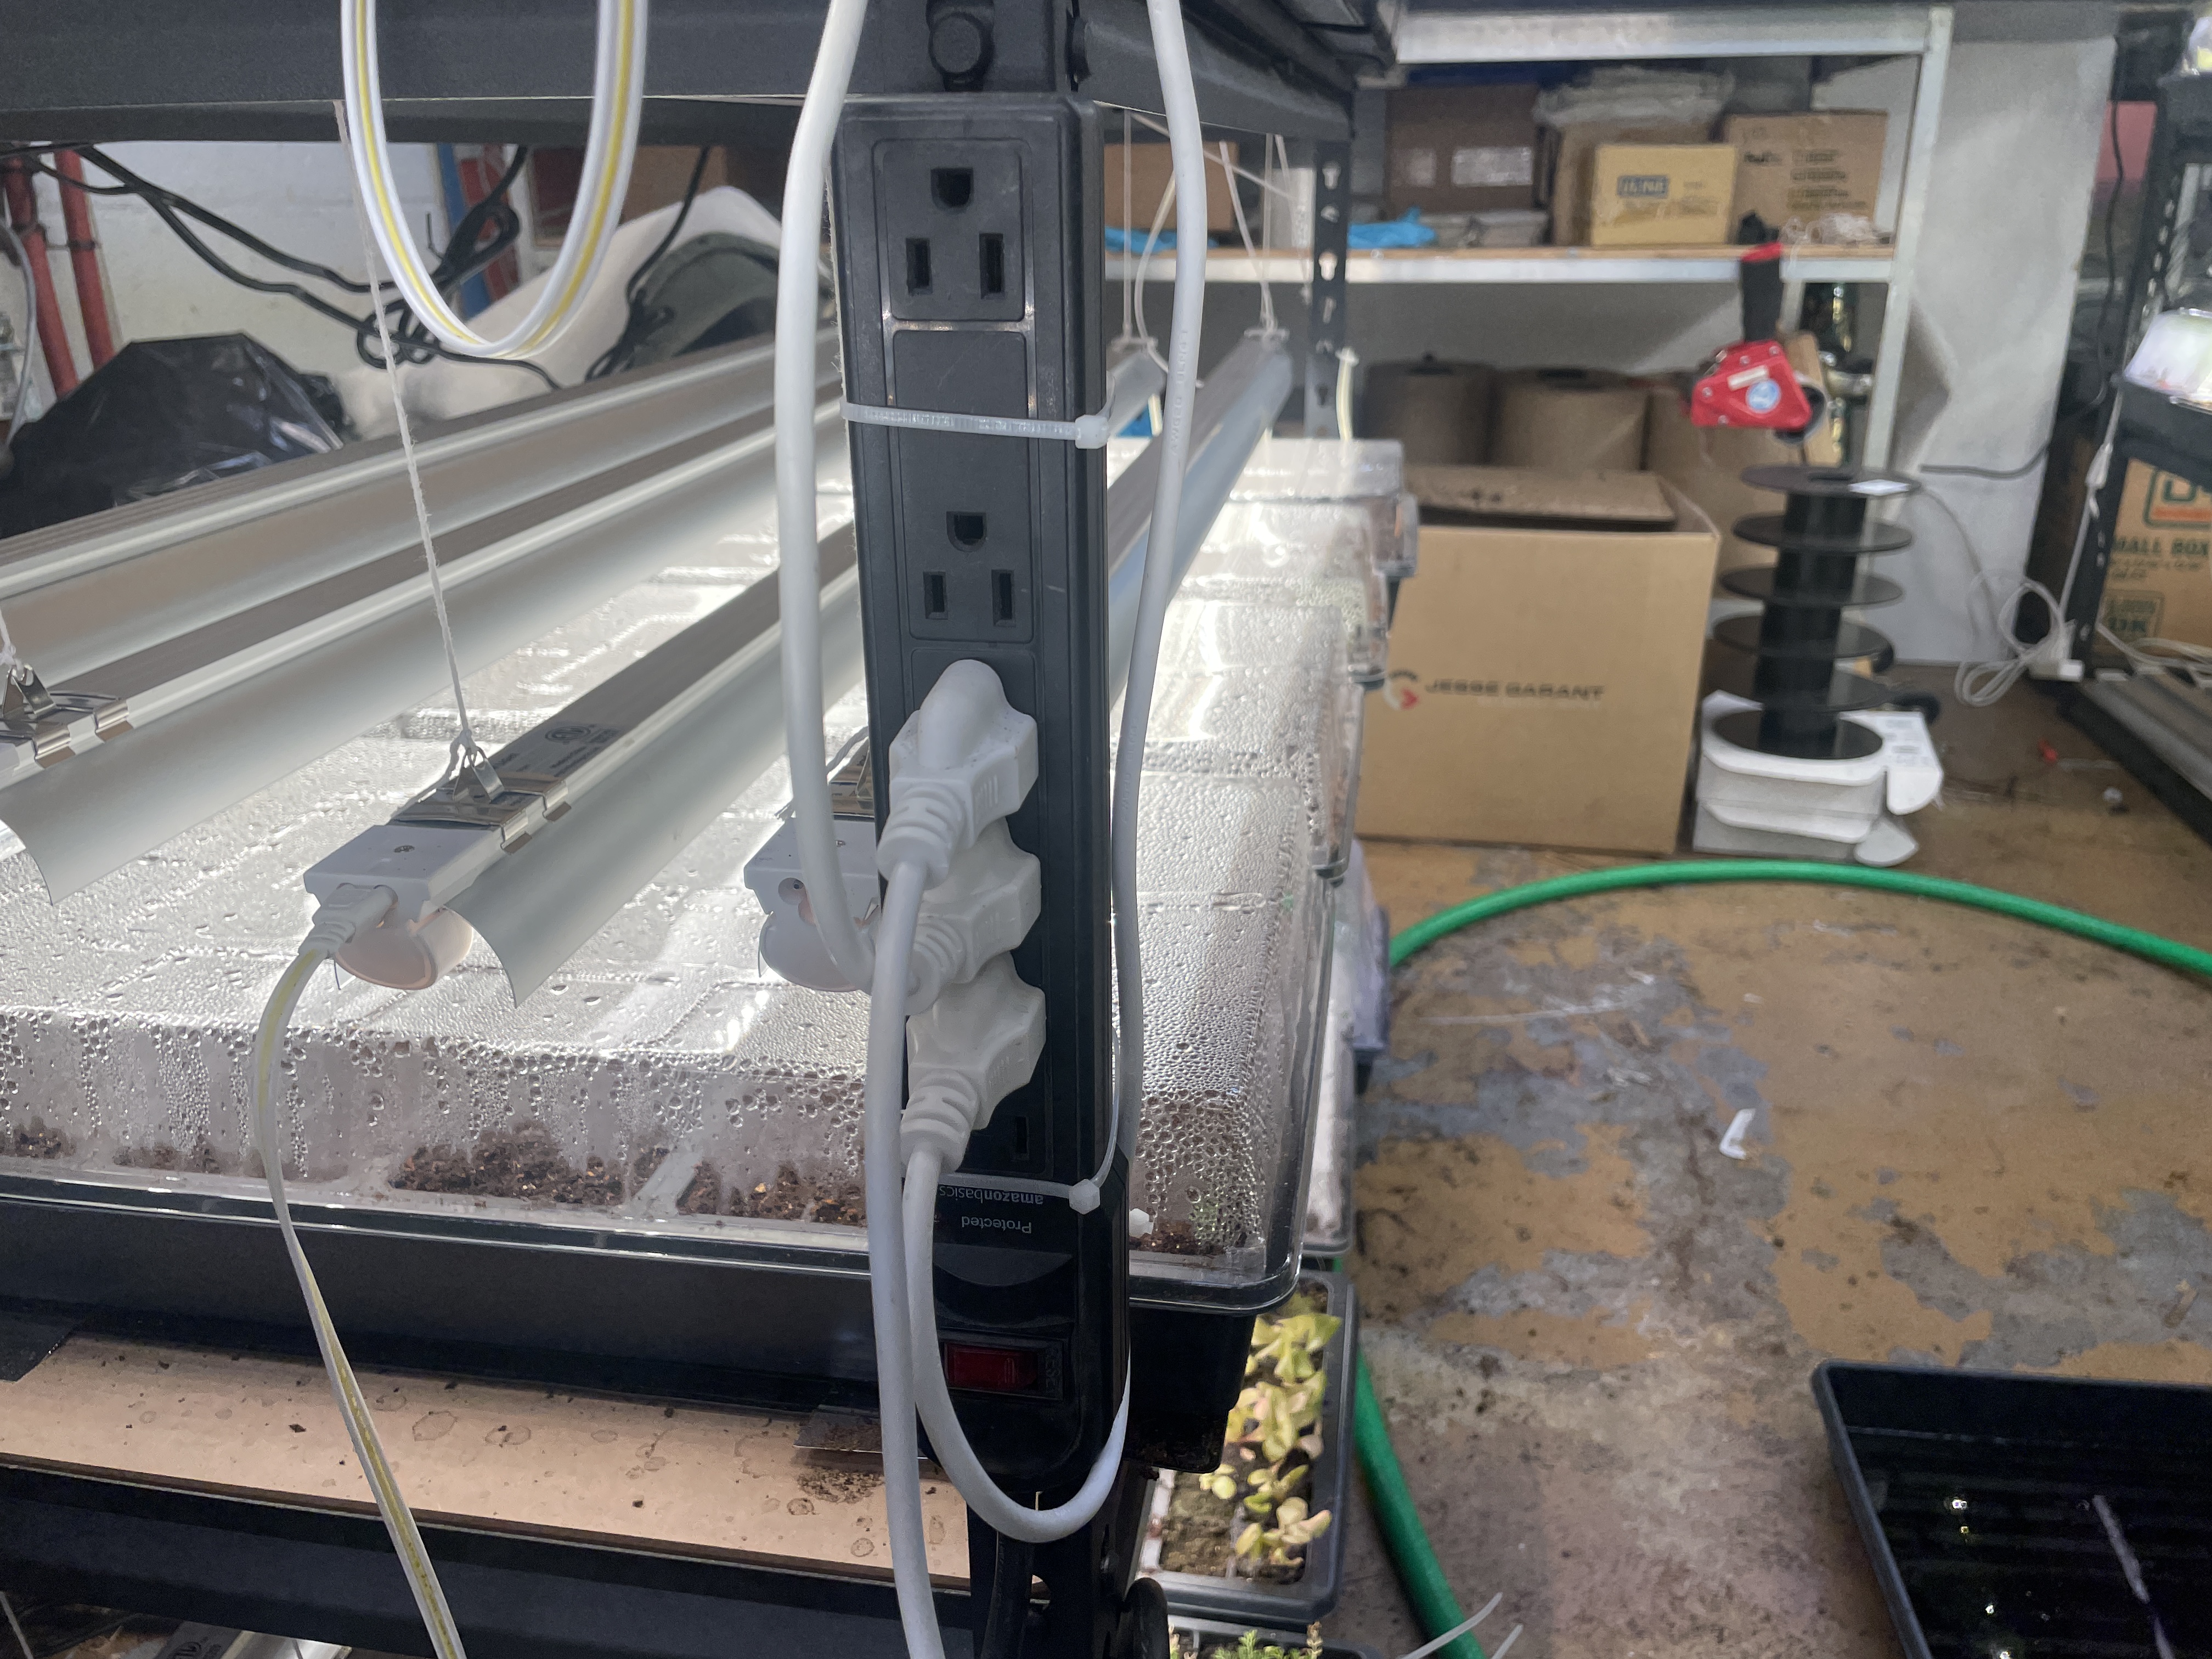
It is true that you should not plug power bars into other power bars. Doing so can increase your risk of fire, so special precautions must be taken before doing so. In my case, I know that the maximum power rating of the power bar is 15A which, at 120v, is 1,800 watts (the same as typical wall recepticals). In Canada, constant draw devices (such as space heaters) are limited to a maximum continuous draw of 1,500 watts. This setup won't come anywhere near that kind of draw, but it is something to keep in mind for your setups (In addition, not all power strips are capable of taking the full rated current through a single outlet. Watch out for this, especially on cheaper power strips).
Each shelf has 672 watts of power for the lights (4x4x42w) and I have each shelf on a separate timer, so I am well within safety margins for this setup.
The heating pads are a similar setup, each shelf plugging into a power strip, which daisy chains down to the bottom one, and into it's own timer outlet.

The power timers I am using are also off of Amazon, and cost around $10 a piece. I liked these particular timers as they are very easy to set, are analog, and don't have any little pins that I can lose (or don't have enough of) to set the times. I set the lights to a 16 hour cycle, and the heating pads to either 100% on when my basement was cold (earlier in the year, around 60F), and 50% on when it got warmer (in 30 minute cycles).
Cable Management
To tidy things up, I tried to run most of the wires along the backs of the shelves, relieving any tension off of the heating pads where I could. Most of the controls are biased to one side of the shelf so that access is easier, and most of the light connecting wires are left to hang off the side of the shelf.
Some different routing might be required if you are running multiple shelves side-by-side, perhaps a small gap of 4" or so would suffice so that the wires hang down the side instead.
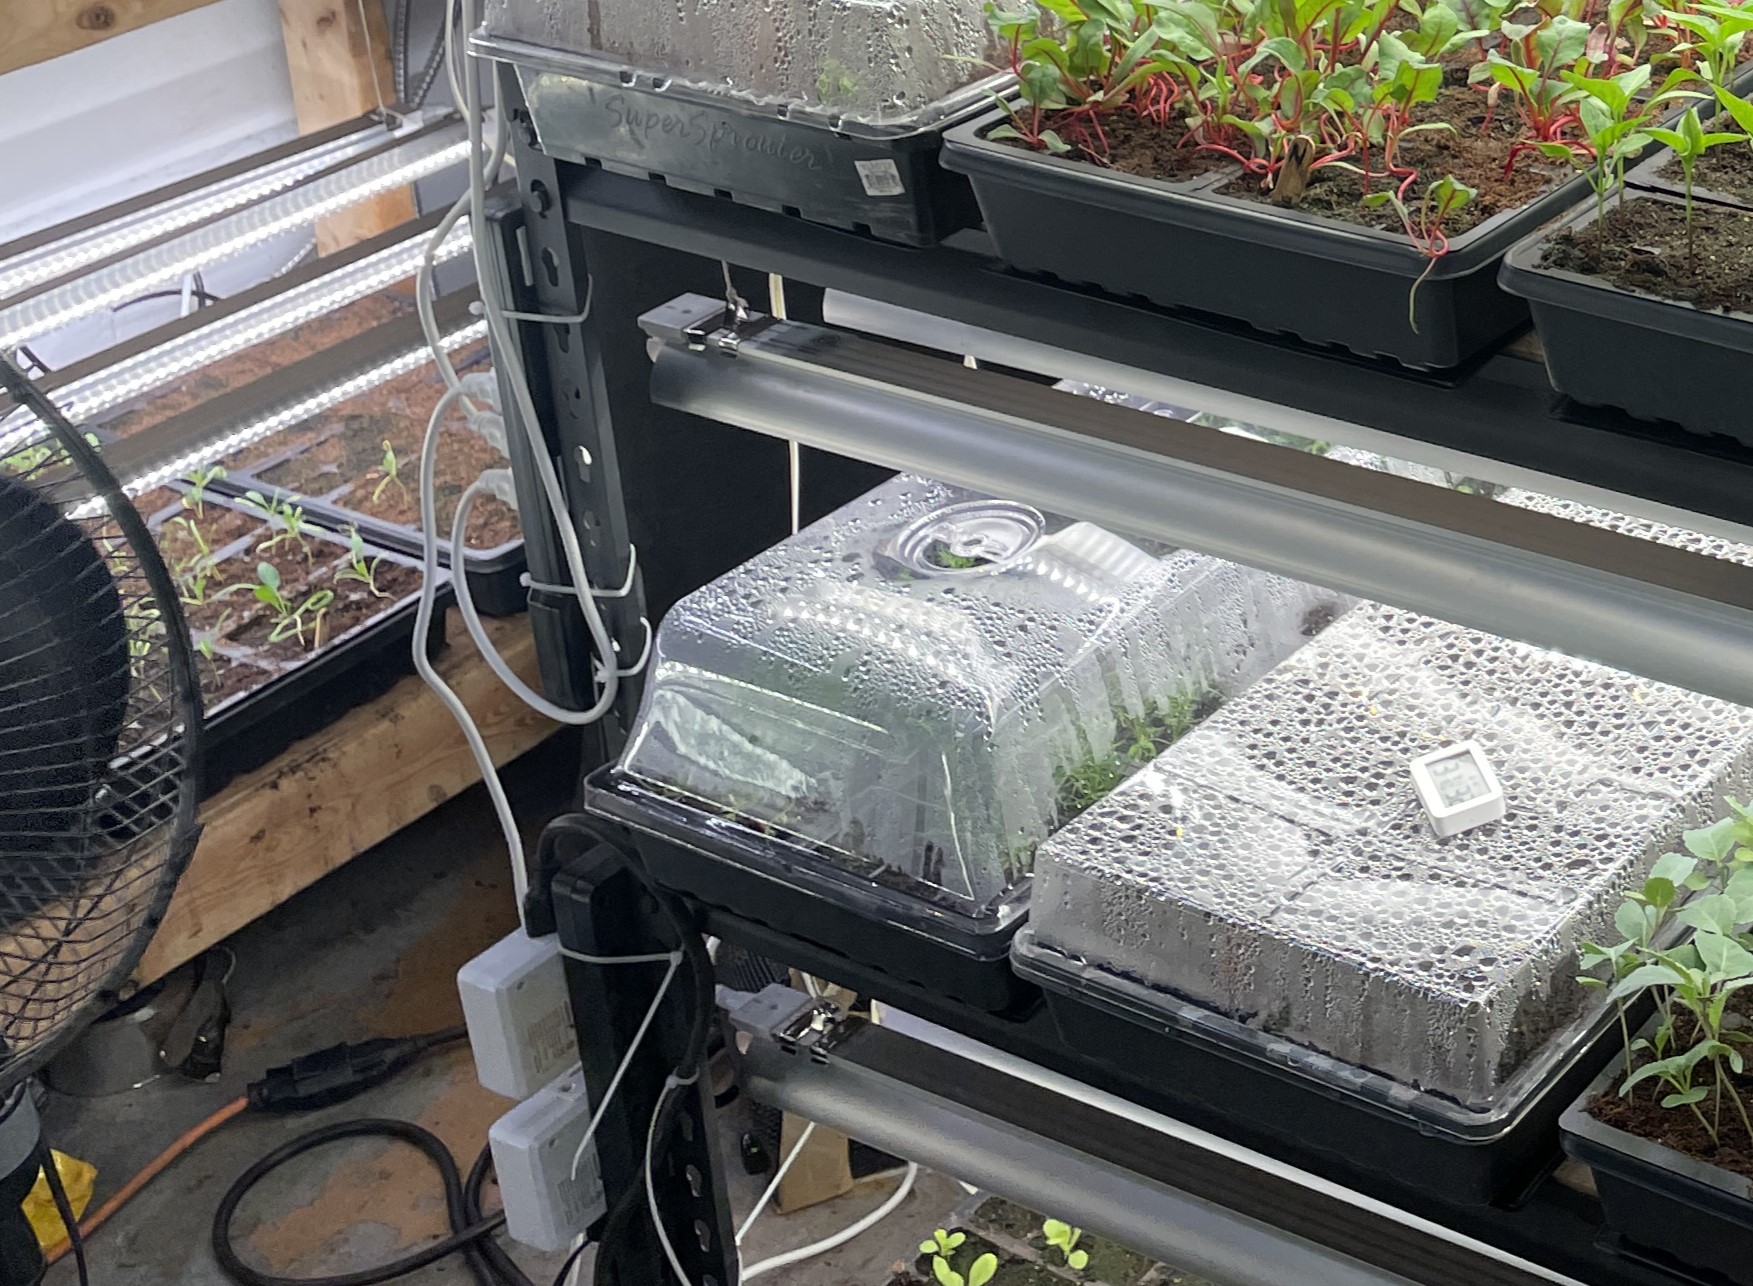
Humidity Domes
I use two different styles of humidity domes; one low profile for early germination, and one taller dome with vents to better control the humidity as the plants grow taller than ~2inches in height.
And this is the taller domes.
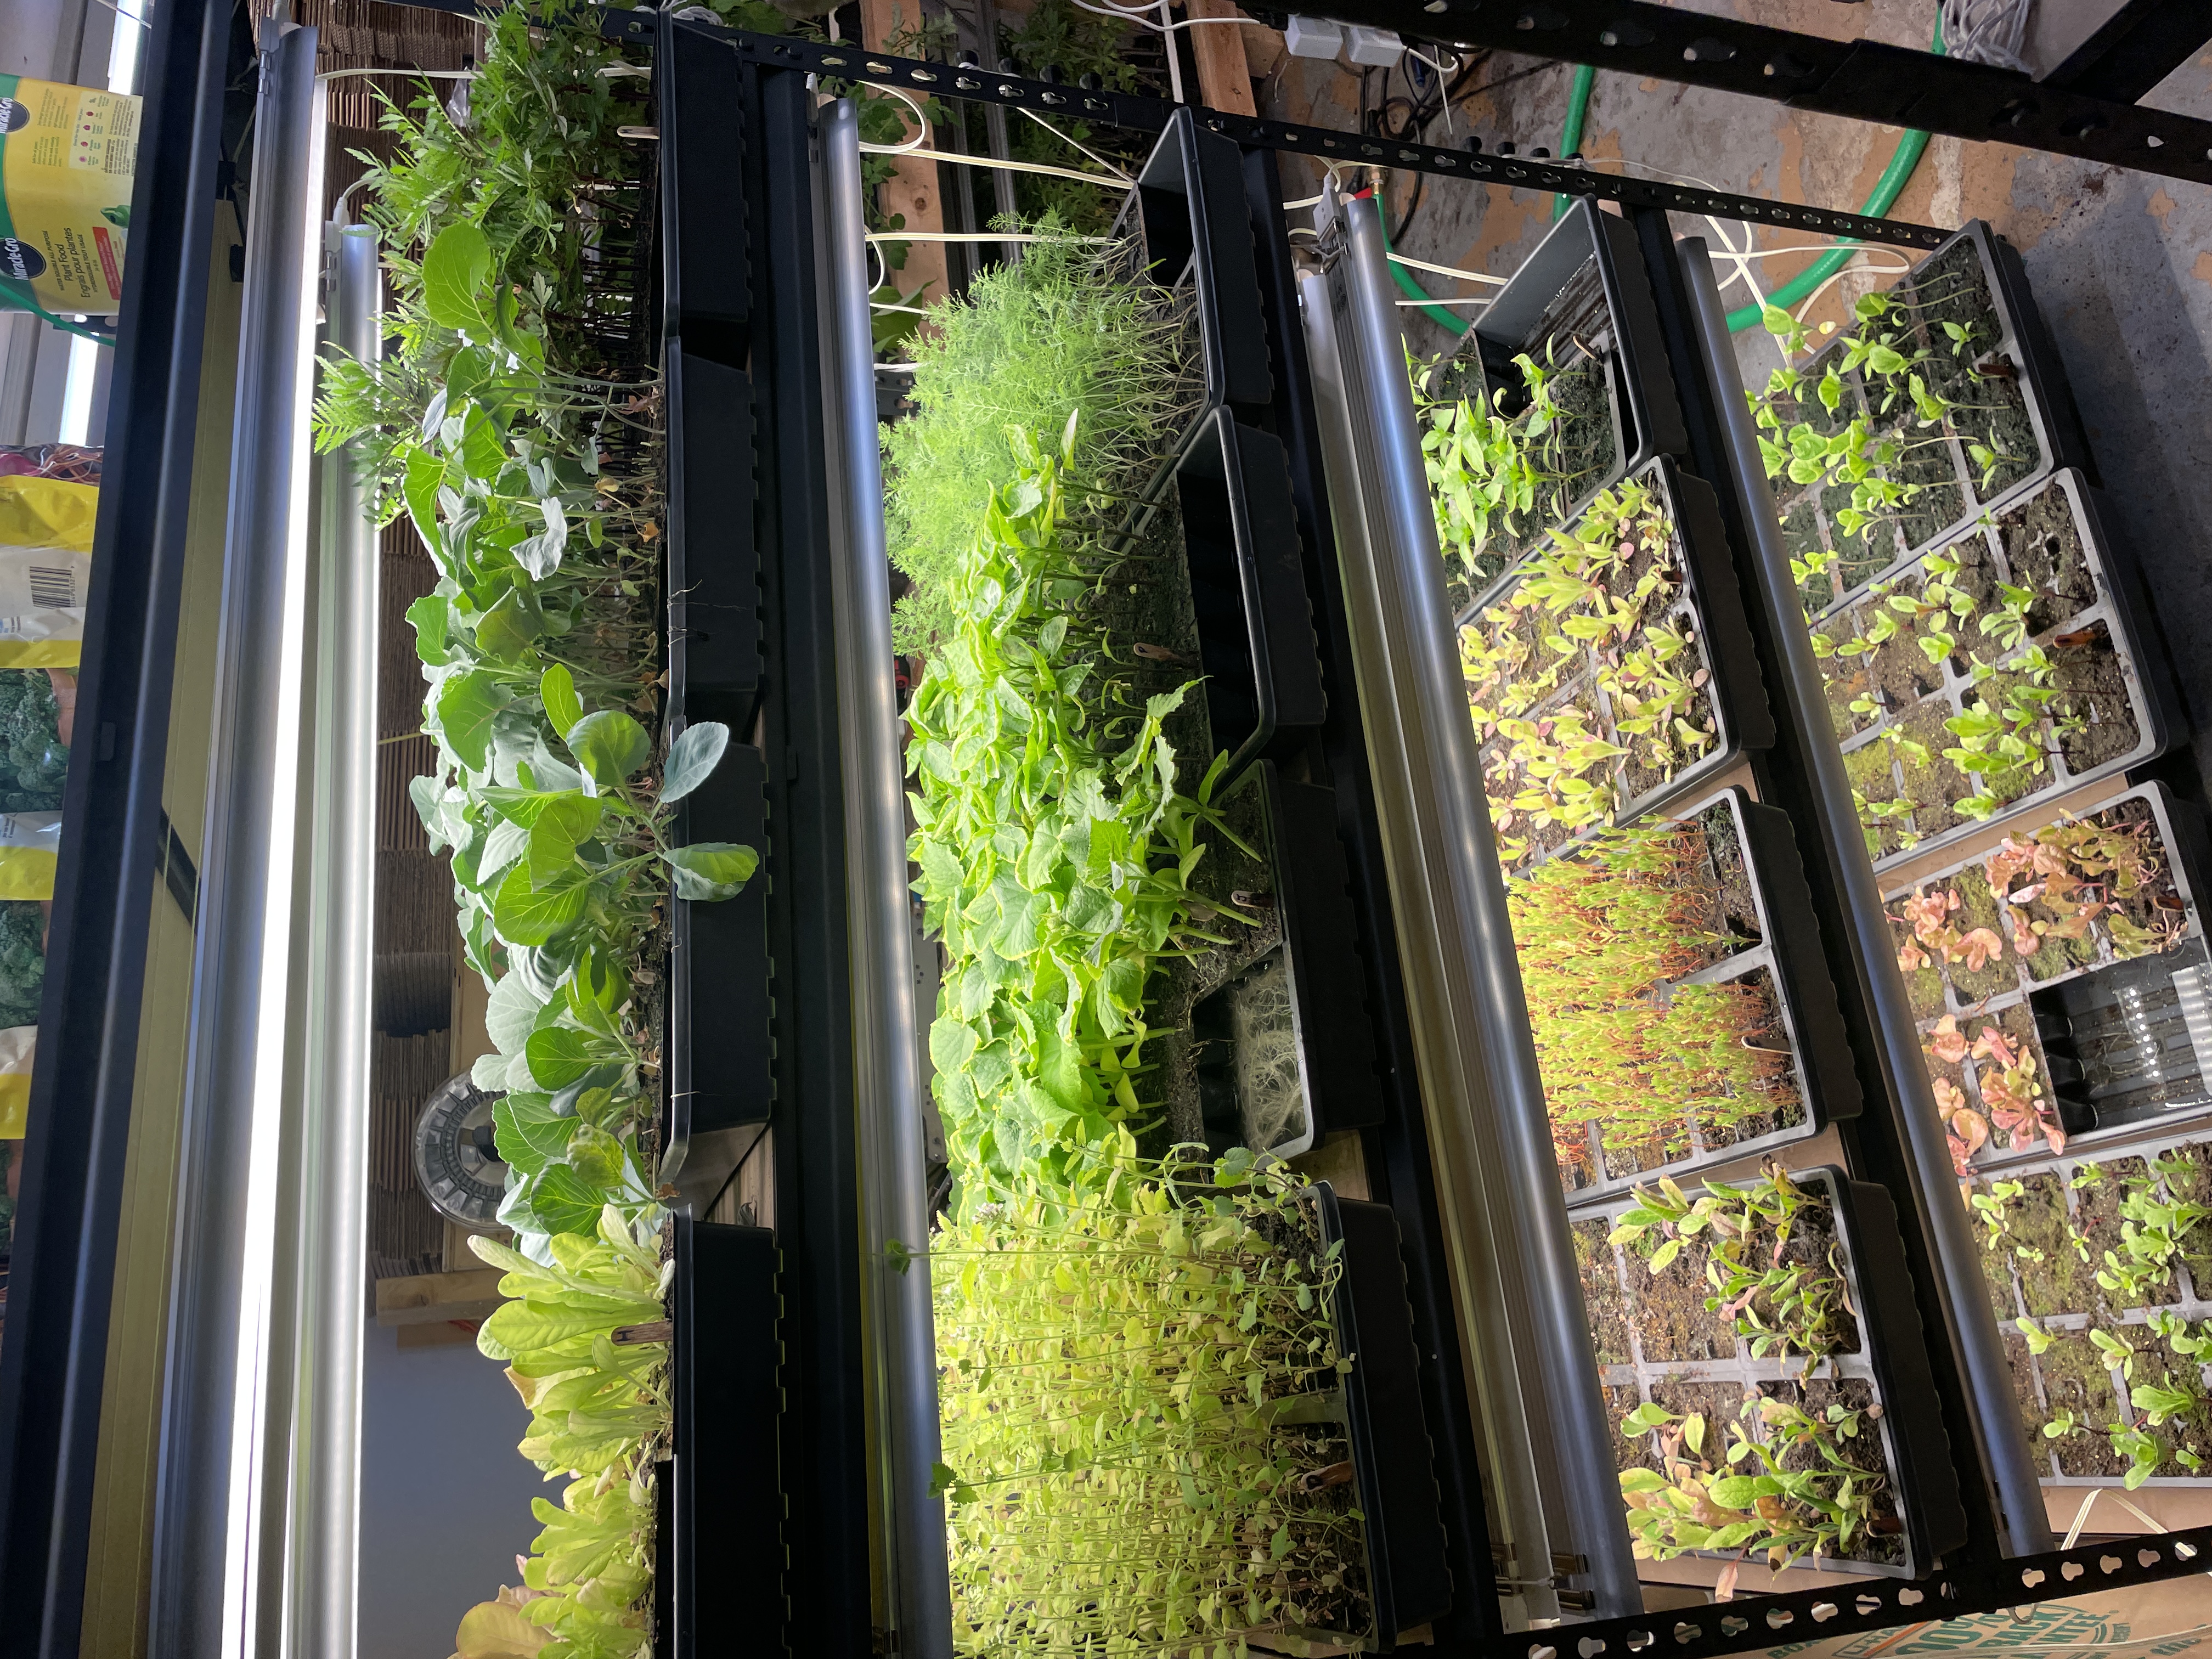
Cell Paks
I am experimenting with a few different cell pak styles, most resulting in 72 plants per tray, although I am trialling a 4 cell (40 per tray) style currently.
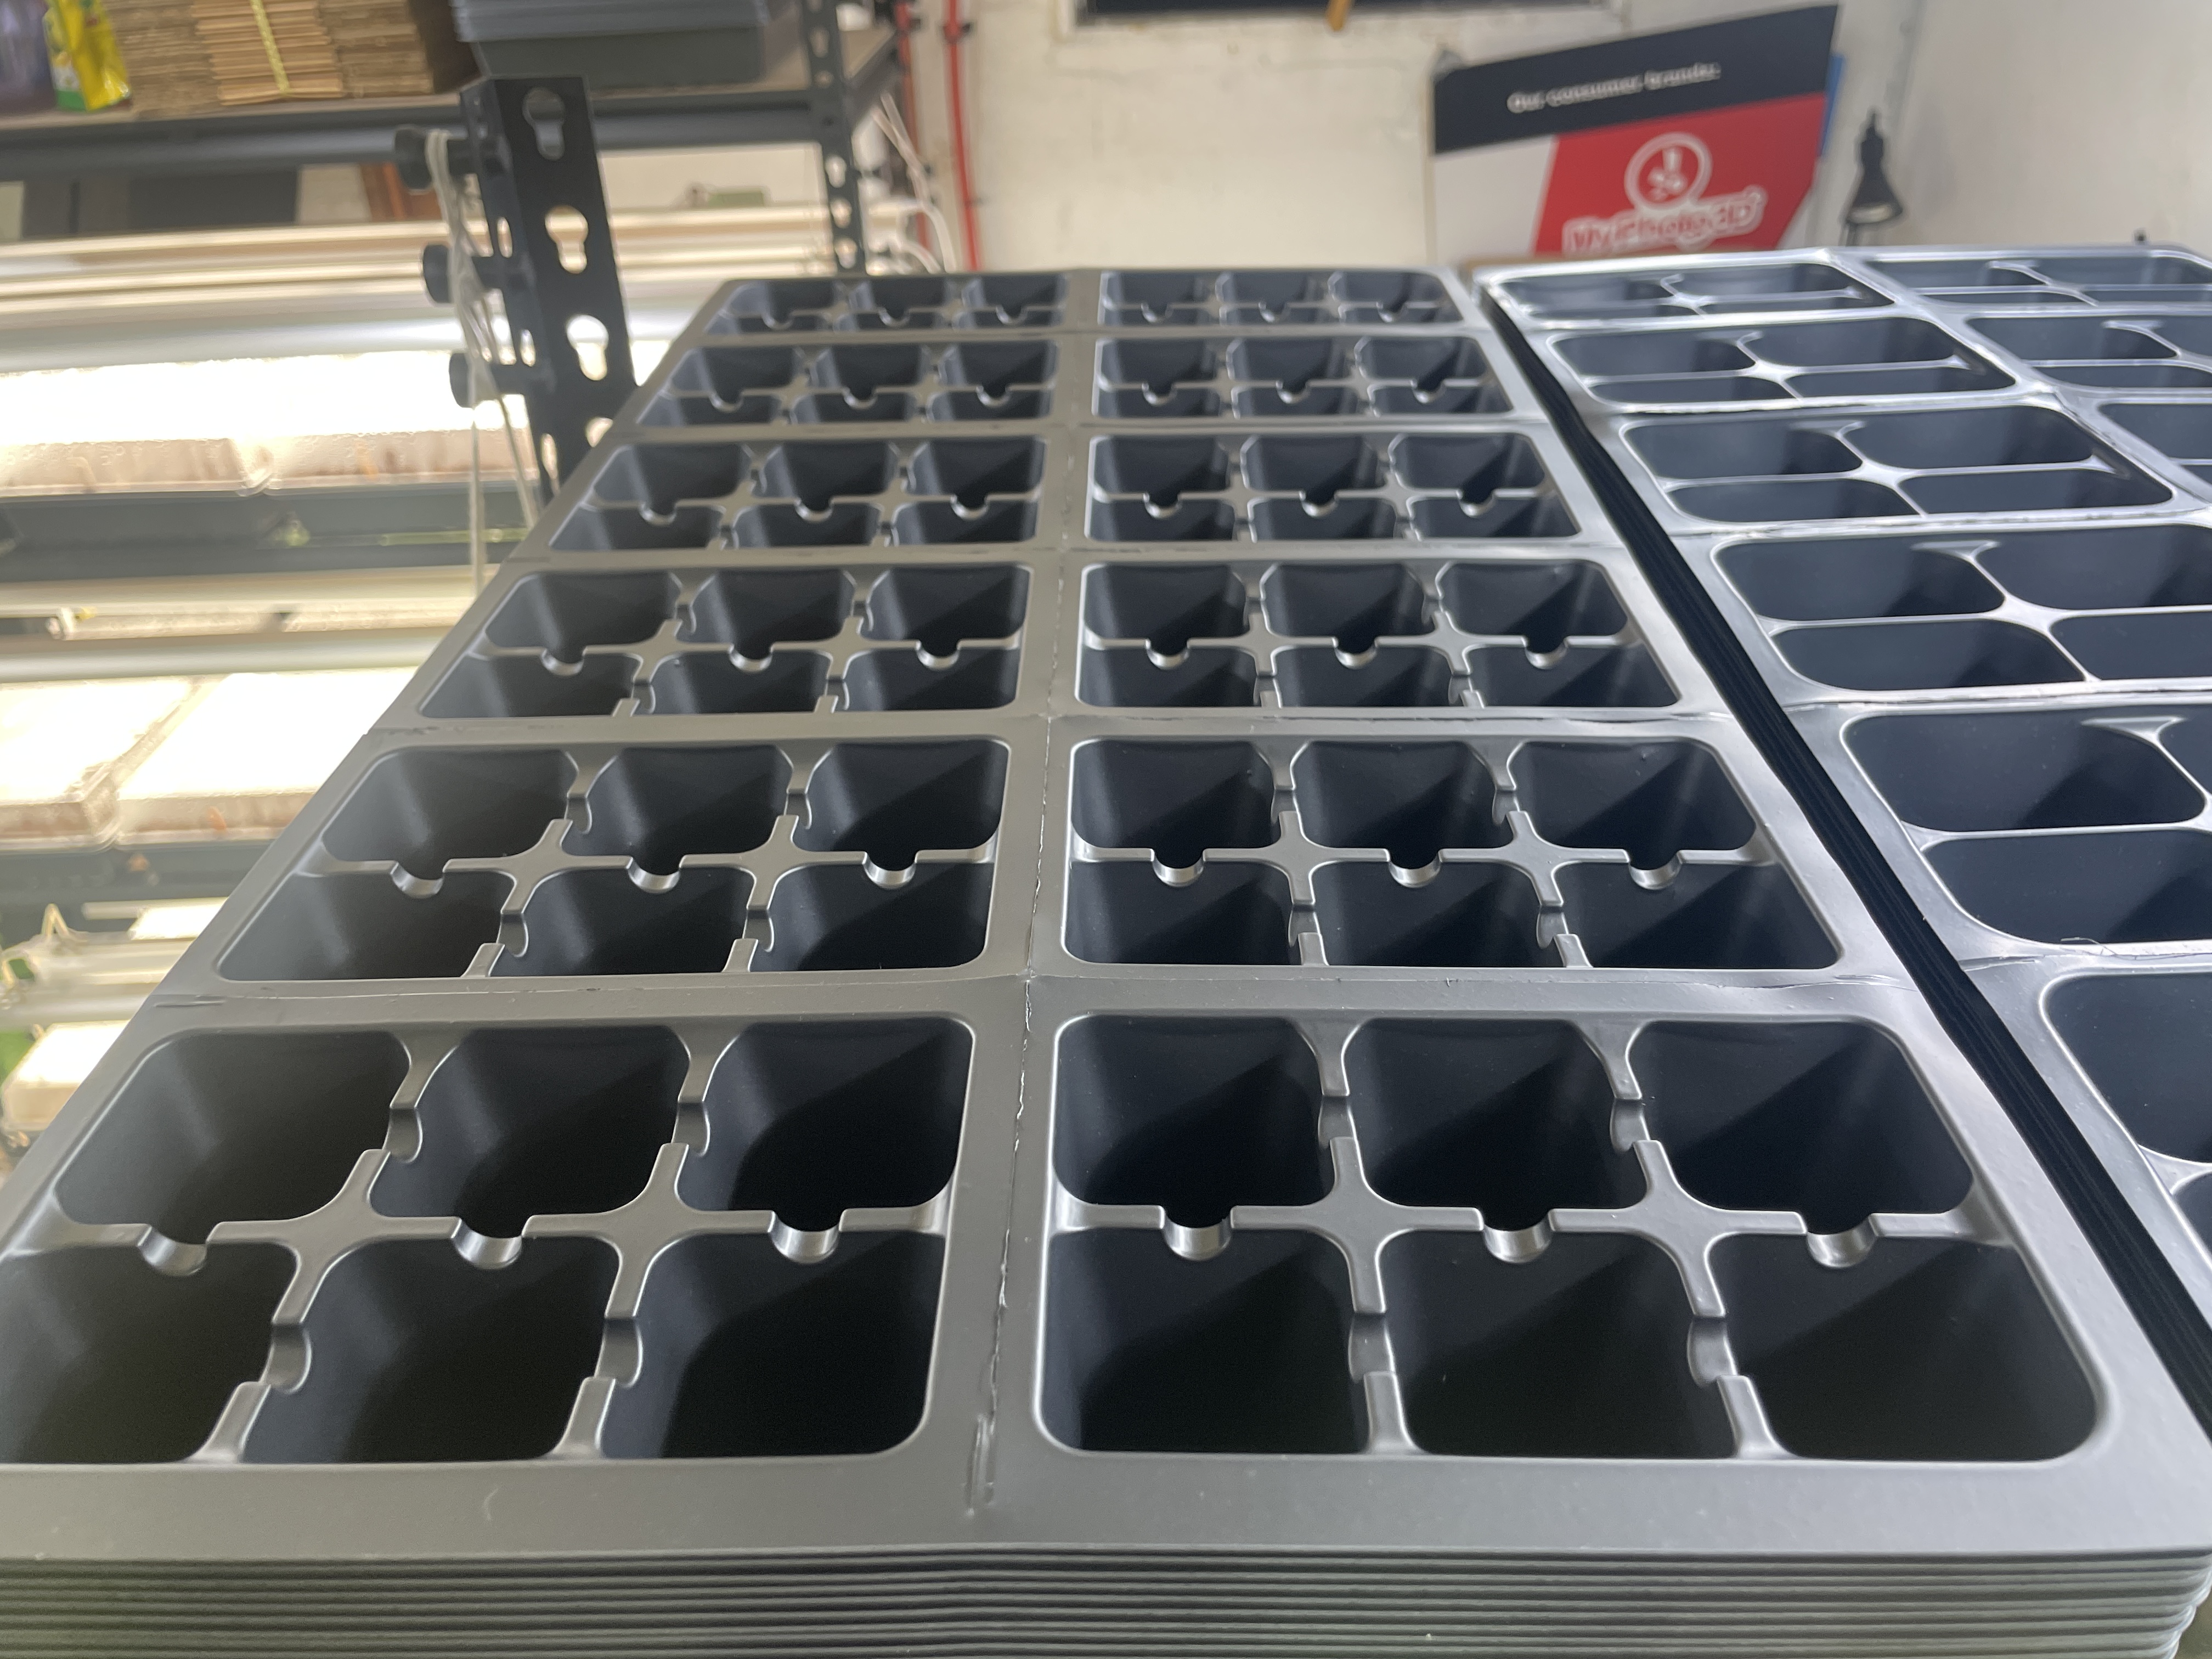
My current preferred cell pak are the 2x3 trays, which have two rows of five paks to make the 72 seedlings. The other option I was looking towards was a three by three configuration, but I found those to be less preferred as they aren't as desireable for vegetables. For flowers it is mostly alright, as people are more likely to want nine as a minimum of a given seedling.
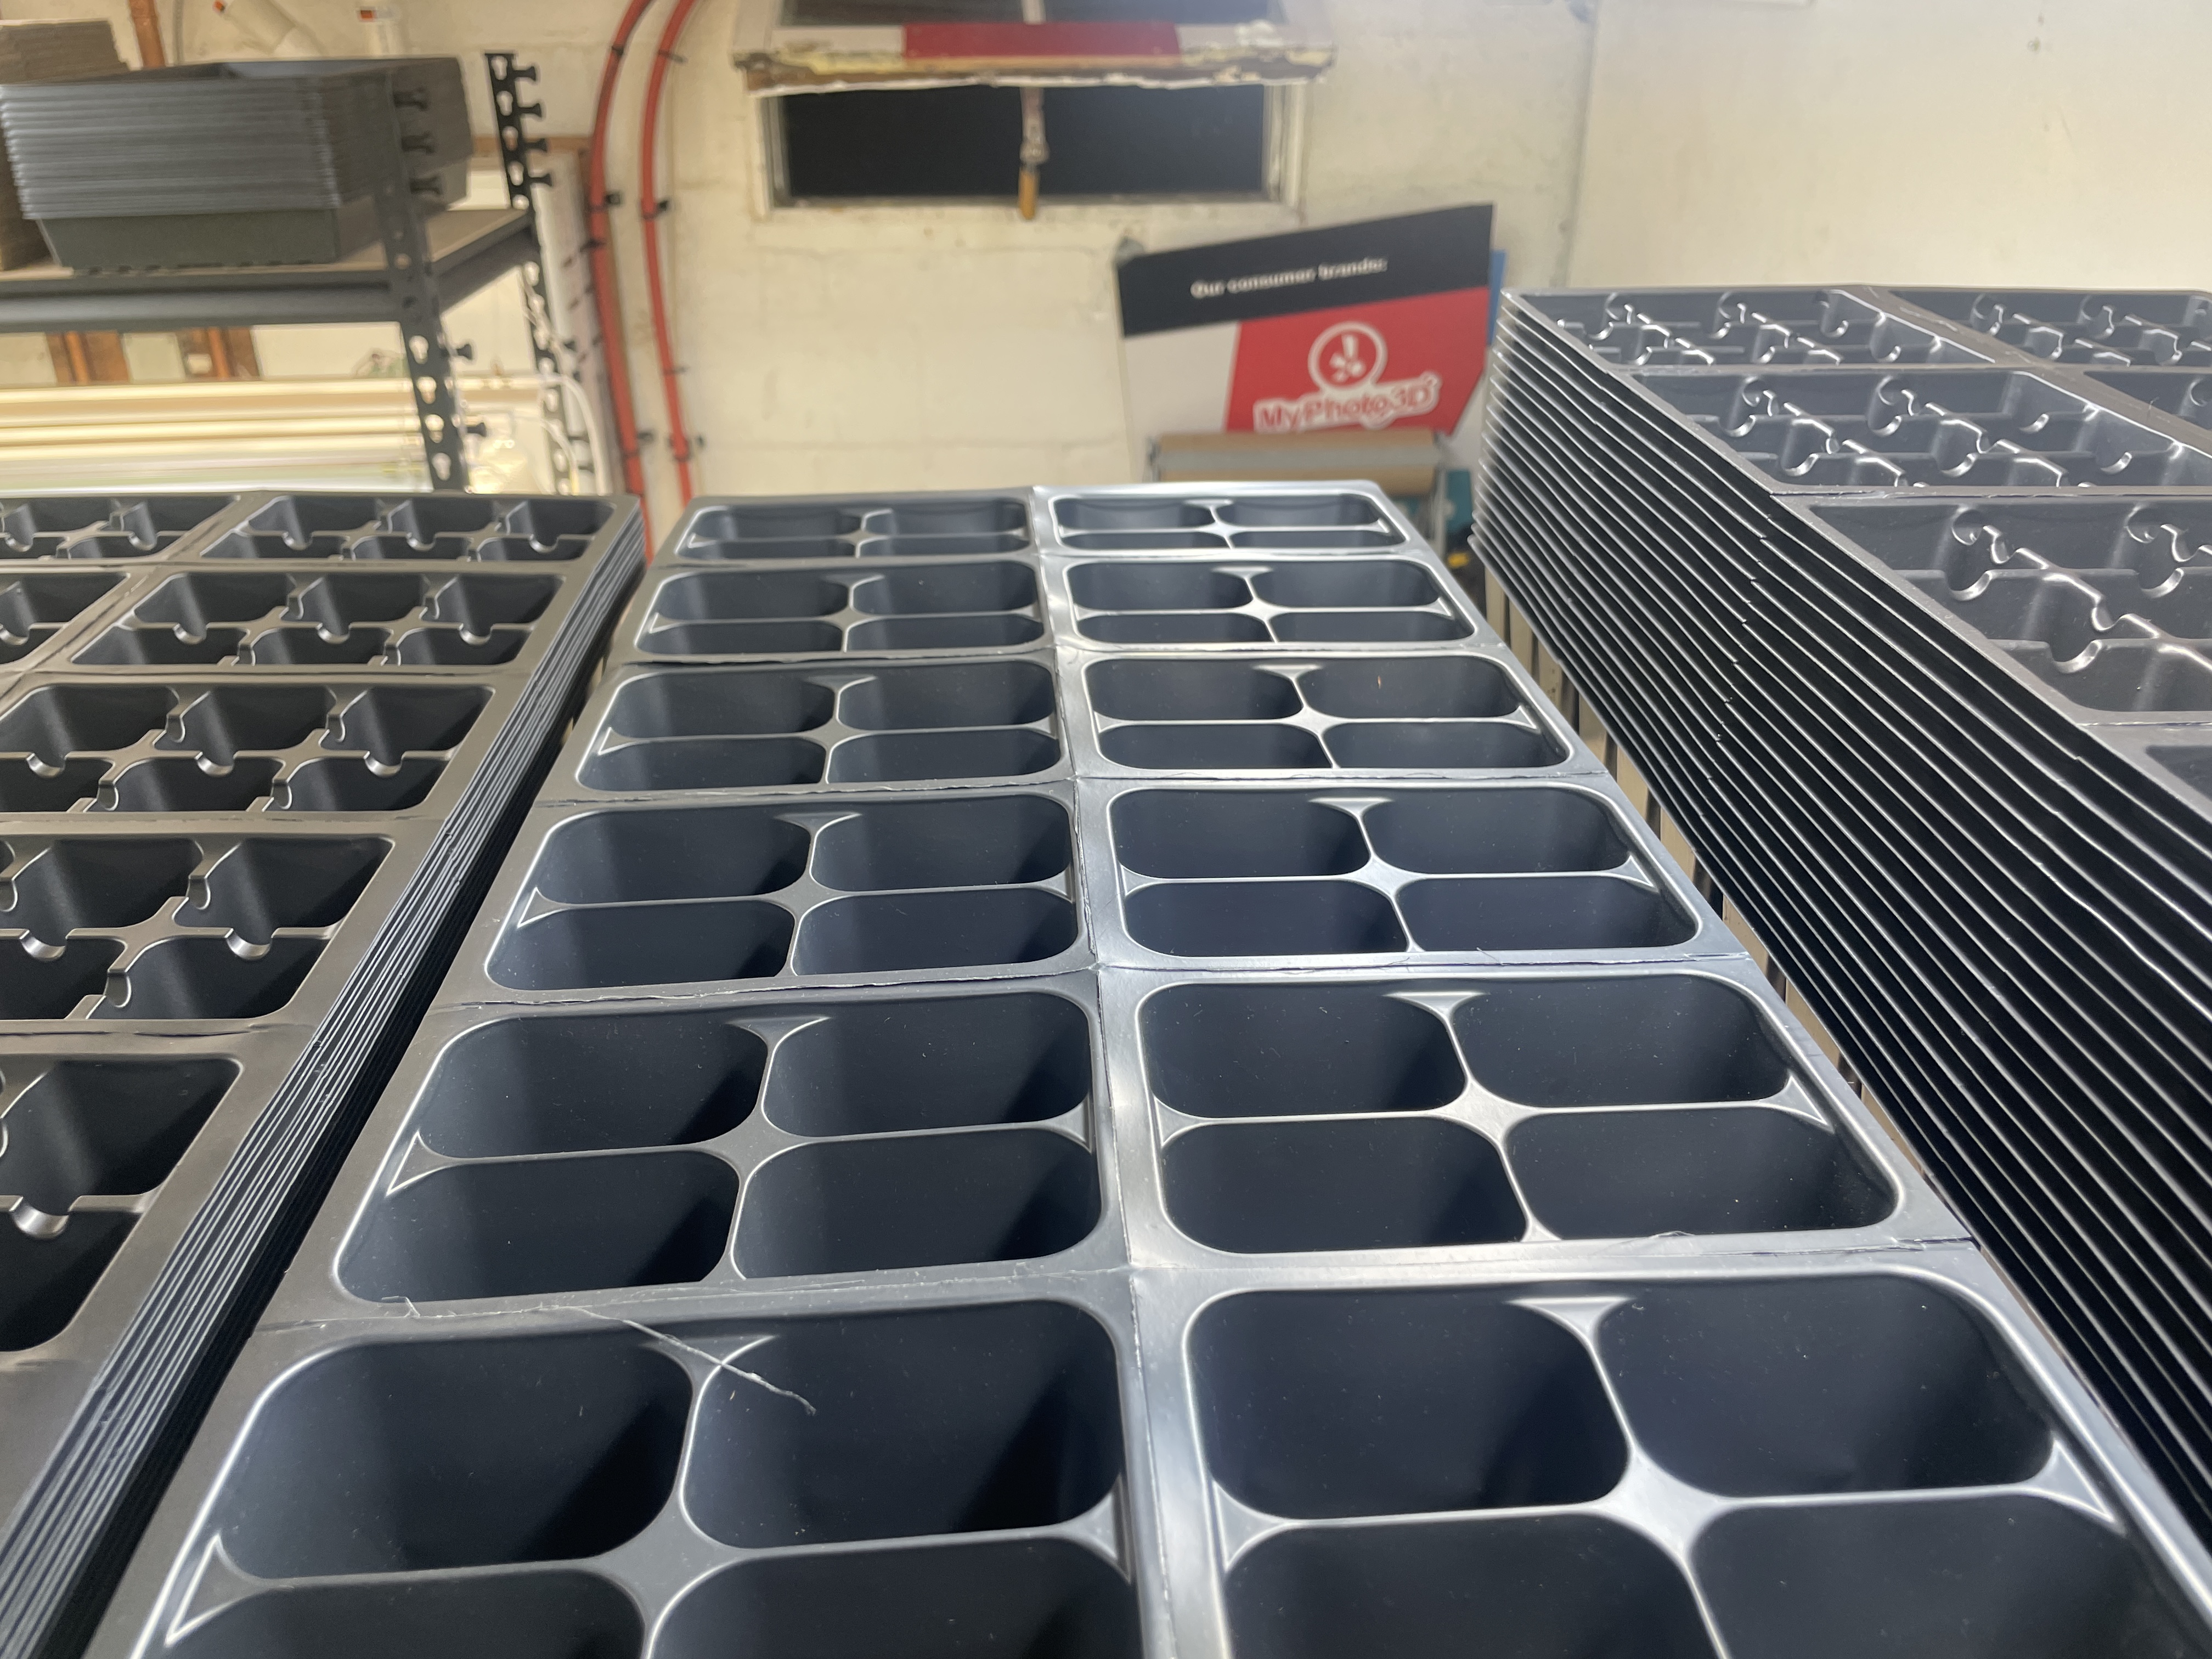
I do have a variant of the 3x3 trays which are wider at the base, but I have yet to try them out. For some of the prolific rooters like the Cucumbers these may be a better option. I will post an update regarding them when I can.
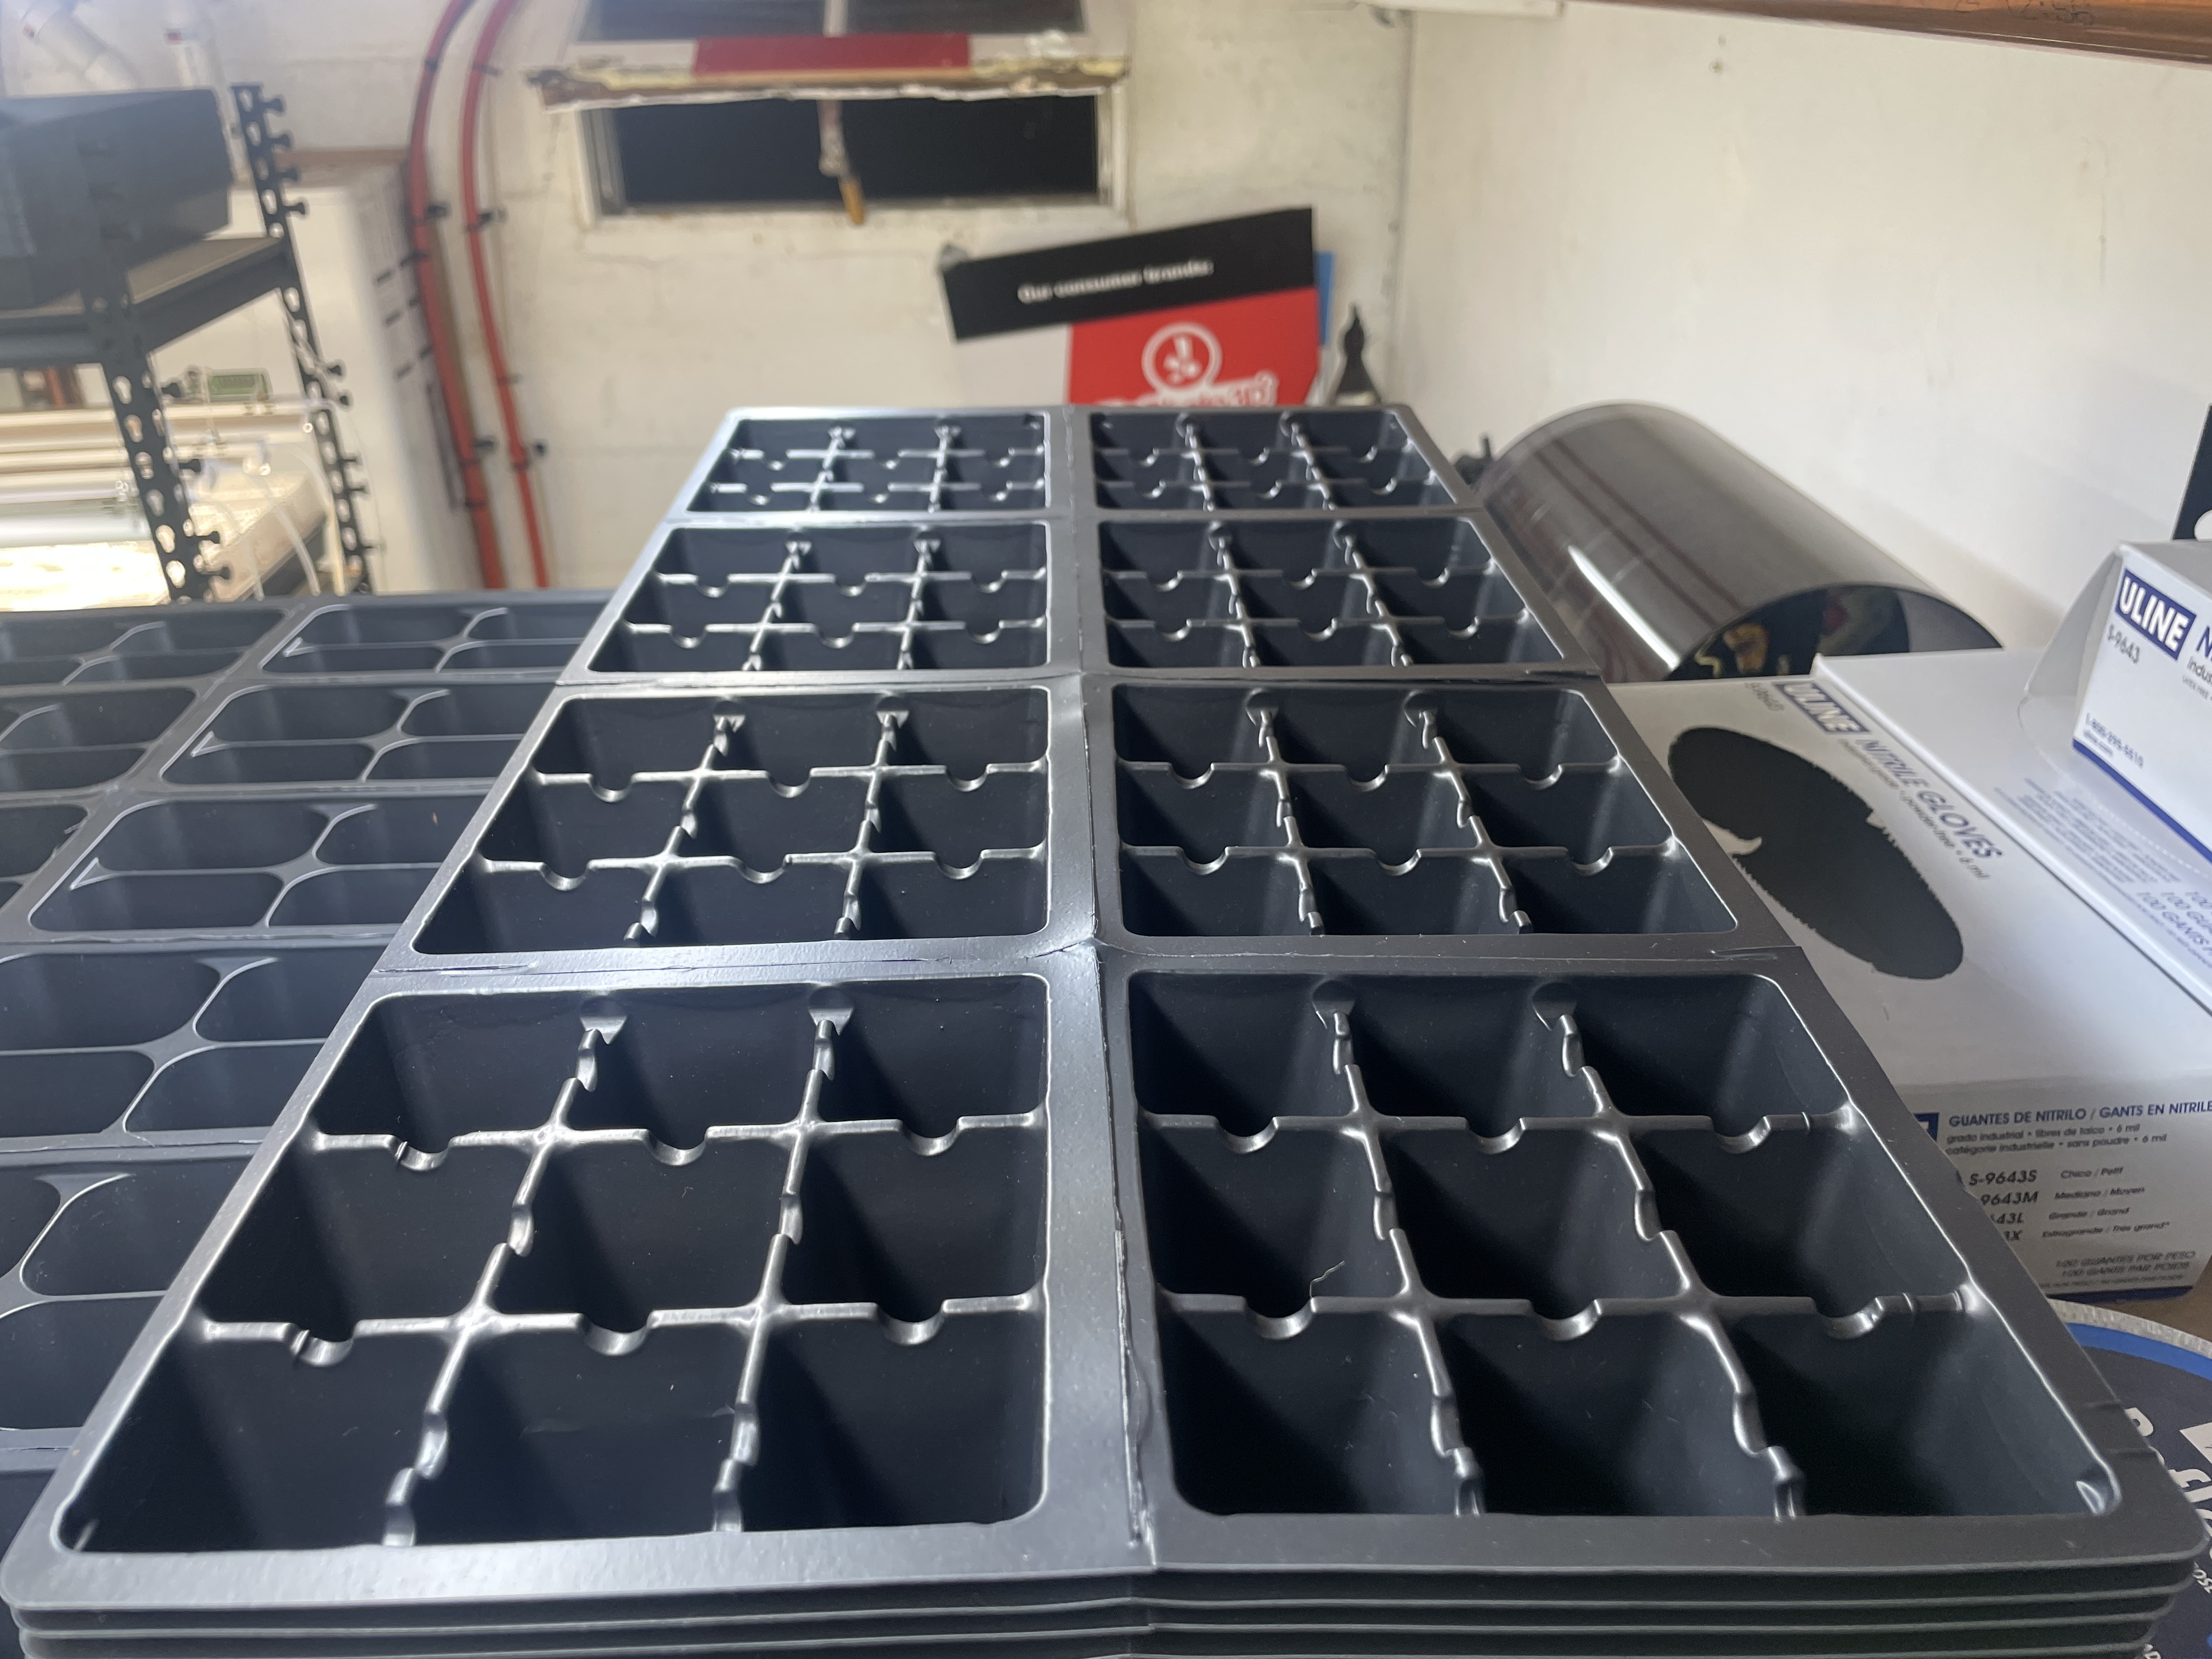
Long story short, don't be afraid to experiment a bit if you are adventurous, but the standard 2x3 cell paks are probably more than sufficient for your needs. Stick to two or three types at most.
Seeds
Most of my seeds come from either saving them the previous year, or purchased direct from OSCSeeds. Link to them here. I've started using some McKenzie seeds this year as well.
You can find most of their seeds in stores here in Windsor (Walmart, HomeHardware etc.) if you don't want to order online.
Improvements
In the future, I would like to add a system for automatic watering of the trays. Either running tubes to each one, or sprinklers overhead. I have quite a lot of sensors which I intend to mess around with implemnenting, although balancing the cost-to-utility at scale is definitely a concern.
The shelves could be a little bit wider. The 1020 trays hang off just a bit, and the heating pads also hang as a result.